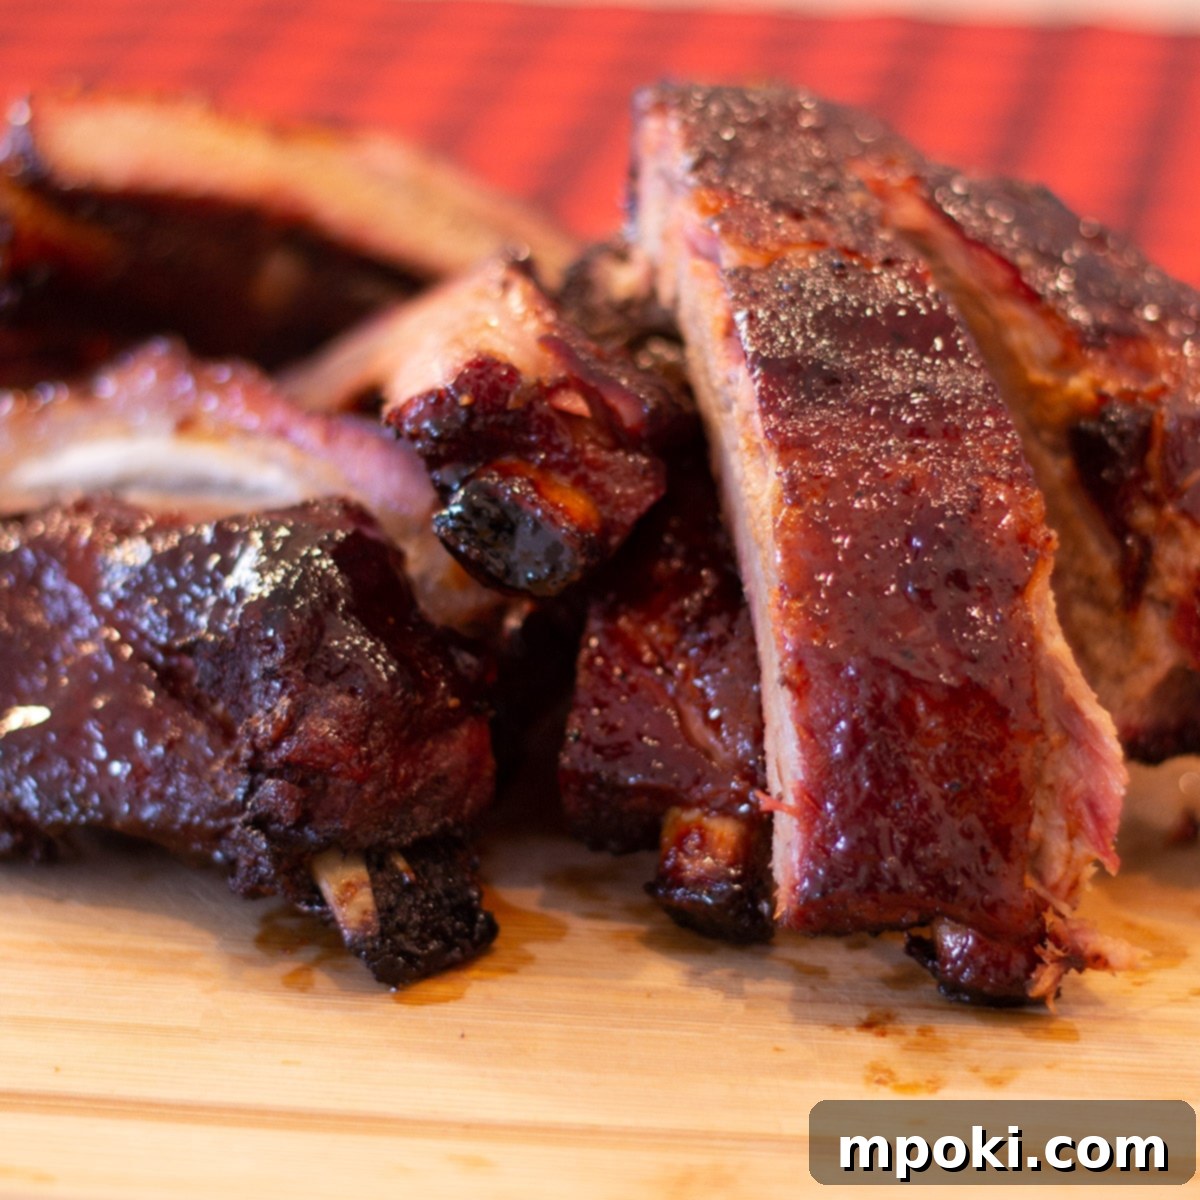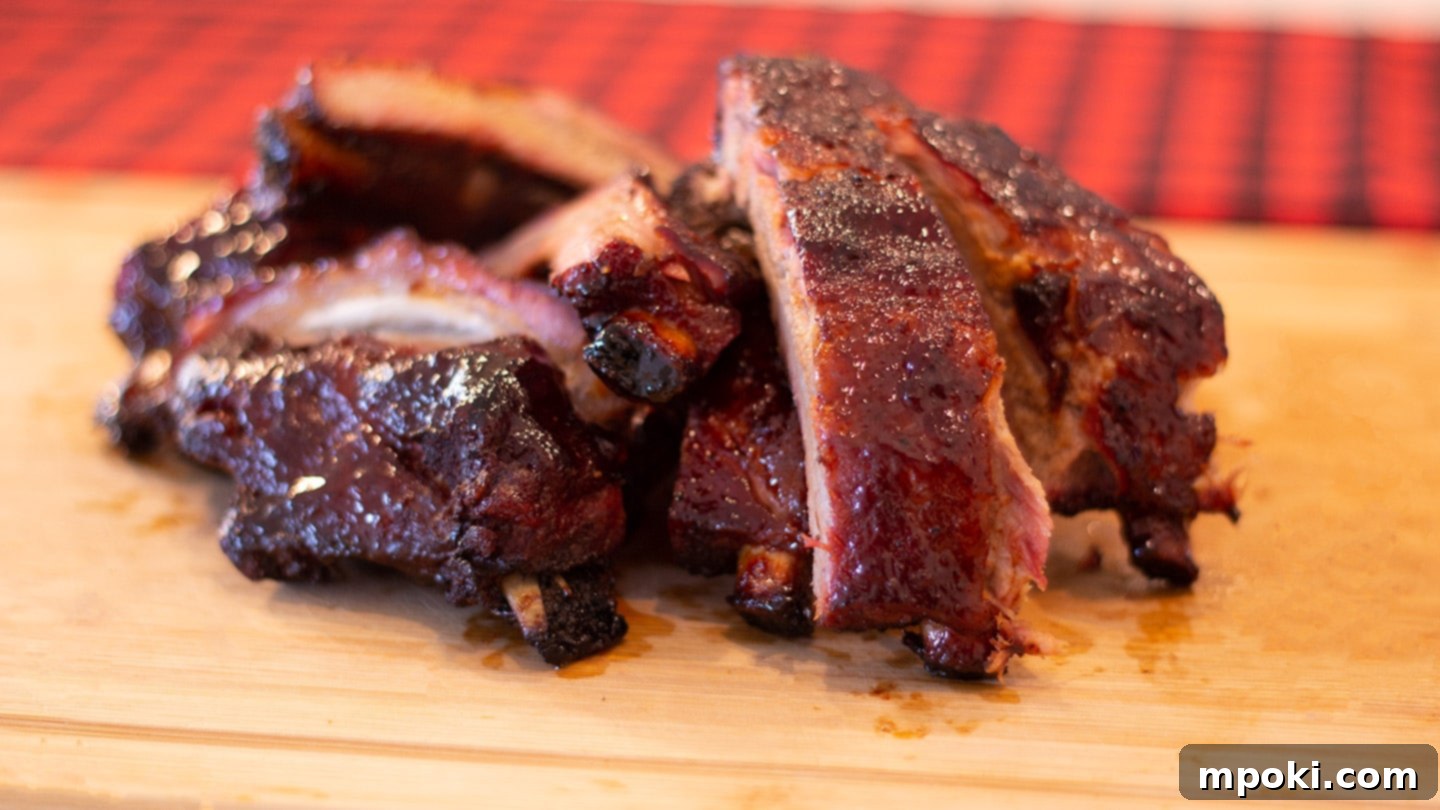
There’s nothing quite like the satisfaction of perfectly smoked ribs, and with Dad’s Weber Kettle Ribs recipe, you’re just a few steps away from creating tender, flavorful barbecue that rivals any restaurant. These smoked baby back ribs are not only incredibly delicious but also surprisingly simple to prepare on your classic Weber Kettle charcoal grill. Even if you don’t have a dedicated smoker, your trusty kettle can be transformed into an effective smoking machine, delivering that sought-after smoky flavor and fall-off-the-bone tenderness.
Whether you’re a seasoned pitmaster or new to the world of low and slow cooking, this guide will walk you through every step to achieve barbecue perfection. From prepping your ribs to mastering indirect heat and finishing with a delectable glaze, get ready to impress your family and friends with some of the best smoked pork ribs they’ve ever tasted. And don’t worry, if you don’t have a grill, we’ve got you covered with easy oven instructions too!
This Page Contains Affiliate Links. For more Info See My Disclosures here.
Mastering Rib Preparation: The Key to Perfect Smoked Ribs
The foundation of outstanding smoked ribs lies in proper preparation. While it might seem daunting, prepping baby back ribs is a straightforward process that makes all the difference in the final texture and flavor. The two main steps are removing the silver skin and applying a delicious dry rub.
Removing the Silver Skin
The silver skin, or membrane, is a tough, thin layer on the back of the ribs. If left on, it becomes chewy and prevents your seasonings from truly penetrating the meat. Removing it is crucial for tender, flavorful ribs. Here’s how to do it effectively:
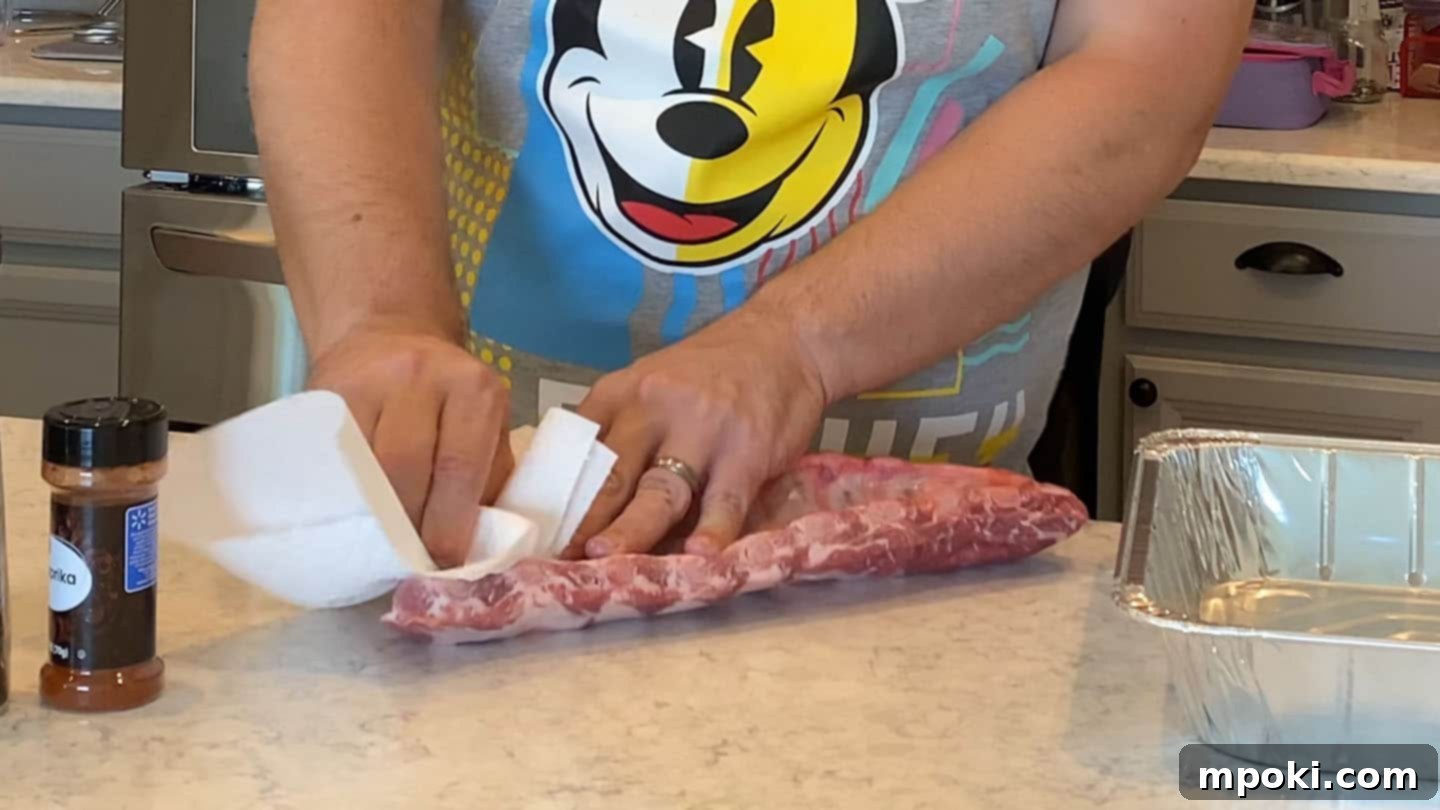
- Locate and Lift: Start at one end of the rack of ribs. Use a small, sharp knife or the handle of a spoon to gently pry up a corner of the silver skin. Work your way under it until you can get a good grip.
- Grip and Pull: Once you have a corner lifted, grab it firmly with a paper towel. The paper towel provides extra grip, preventing your hand from slipping. With a steady motion, pull the membrane slowly and evenly across the rack. It should peel off in one long strip.
- Practice Makes Perfect: Don’t get discouraged if it tears initially. It takes a little practice, but once you get the hang of it, you’ll be removing silver skin like a pro. If it’s particularly stubborn, you can remove it in smaller sections.
Crafting Your Signature BBQ Rib Rub
Once the silver skin is removed, it’s time to season your ribs generously. A good dry rub creates a flavorful crust, known as the “bark,” during the smoking process. Dad’s go-to seasoning blend is simple yet incredibly effective, balancing savory, sweet, and smoky notes:
- Garlic powder
- Onion powder
- Sea salt
- Freshly ground black pepper
- Paprika (for color and mild sweetness)
Application Tips: Don’t be shy with the rub! Sprinkle a nice, even coating over all surfaces of the ribs, patting it gently to ensure it adheres well. There’s no need to massage it in aggressively; a light pat is sufficient. For best results, after seasoning, let the ribs rest in the refrigerator for at least an hour, or even overnight, to allow the flavors to meld and penetrate the meat. This step significantly enhances the taste of your smoked pork ribs.
Choosing Your Ribs: While this recipe focuses on baby back ribs, you can apply similar techniques to spare ribs or St. Louis-style ribs. Baby back ribs are smaller, leaner, and cook faster, coming from the upper rib cage. Spare ribs are larger, meatier, and have more fat, requiring a longer cooking time but offering a richer flavor. St. Louis-style ribs are spare ribs that have been trimmed to a rectangular shape, making them easier to handle and cook evenly. Always look for ribs with good meat coverage and minimal exposed bone.
Mastering Your Weber Kettle for Smoked Ribs
The Weber Kettle is a backyard barbecue icon, and while it’s not a dedicated smoker, its design makes it surprisingly effective for achieving tender, smoky ribs. The key is setting it up for “2-zone cooking,” which allows for low and slow indirect heat – essential for perfectly smoked baby back ribs.
Understanding 2-Zone Cooking
Two-zone cooking means creating a hot side (direct heat) and a cooler side (indirect heat) on your grill. For ribs, we’ll be cooking exclusively on the indirect side. This prevents the ribs from burning while allowing them to slowly tenderize and absorb smoky flavor over several hours.
Setting Up Your Weber Kettle for Smoking
There are a few popular methods for creating the ideal smoking environment in your Weber Kettle:
- The Simple Charcoal and Water Pan Method (Dad’s Favorite):
- Place charcoal briquettes or lump charcoal on one side of the lower grate. Form a pile or a snake for longer burns.
- On the opposite side, place a disposable aluminum pan filled with water. This water pan serves multiple purposes: it acts as a heat sink to stabilize the temperature, adds moisture to the cooking environment, and catches drippings.
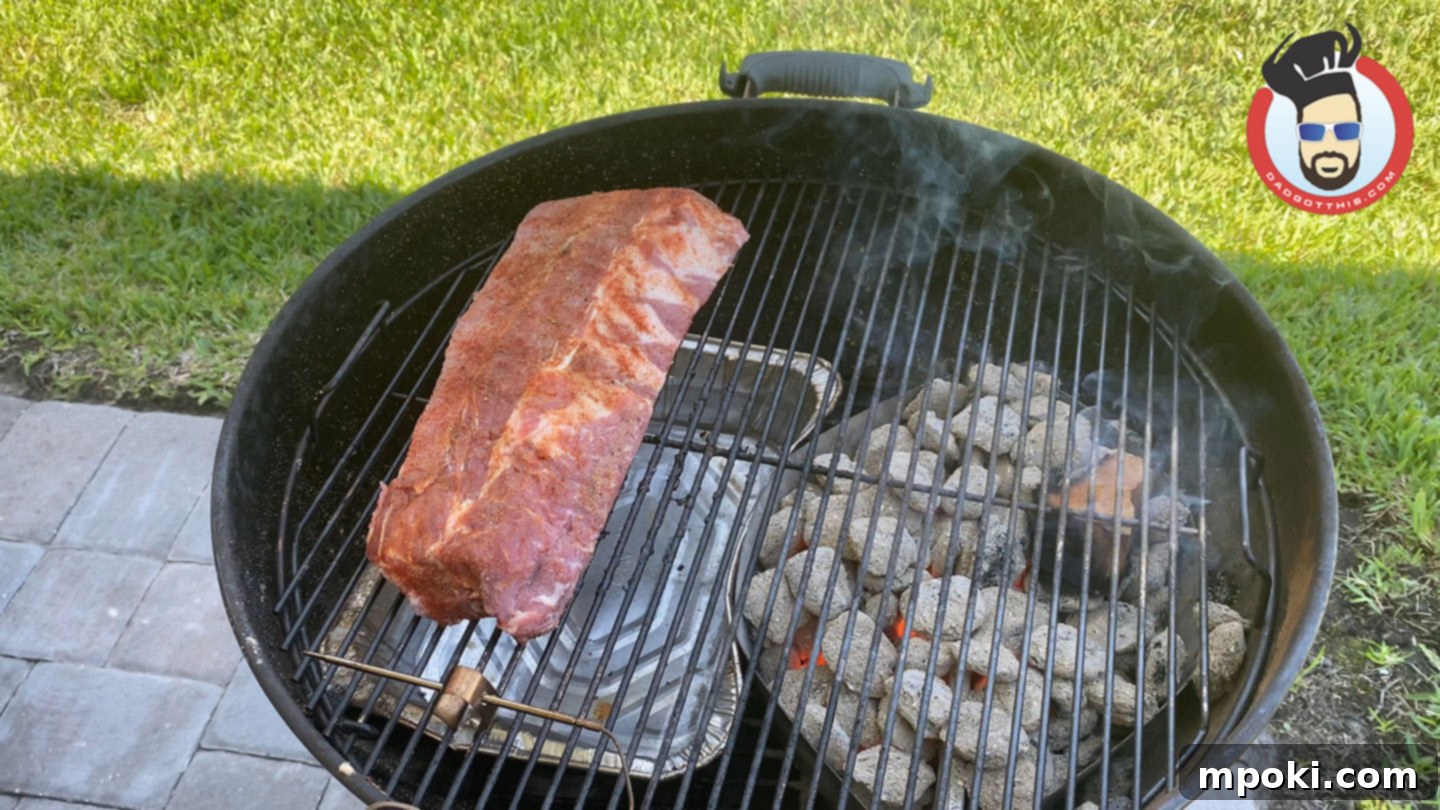
- Once the charcoal is lit and the grill reaches your target temperature, place the ribs over the water pan on the indirect side.
- The “Charcoal Snake” Method:
- Arrange briquettes in a “snake” or “C” shape around the perimeter of the lower charcoal grate, two briquettes wide and two high.
- Place a water pan in the center of the grill.
- Ignite about 10-12 briquettes in a chimney starter. Once they’re ash-covered, place them at one end of your charcoal snake. This method allows for a very long, consistent burn with minimal intervention.
Charcoal and Wood Selection: Use good quality charcoal. Briquettes burn more consistently, while lump charcoal offers a more natural flavor. For that quintessential smoky taste, add a few chunks of smoking wood (like apple, hickory, or cherry) directly onto the lit charcoal. Apple wood provides a mild, sweet smoke that pairs wonderfully with pork ribs. There’s no need to pre-soak wood chunks; dry wood produces cleaner smoke.
Temperature Control: Aim for a consistent temperature range of 250-275°F (120-135°C). You’ll primarily control this temperature using the top and bottom vents of your Weber Kettle. Keep the bottom vent mostly open to feed oxygen to the coals, and adjust the top vent to fine-tune the temperature. A good grill thermometer (either built-in or a reliable digital probe) is essential for monitoring your grill’s temperature.
Once your grill is set up and up to temperature, place the seasoned ribs directly on the grill grate over the indirect side. Close the lid and let the magic happen for 2-3 hours. During this initial smoking phase, you can mist the ribs every 30-45 minutes with a spray bottle filled with apple juice or a mixture of water and apple cider vinegar. This helps keep the ribs moist and promotes a good bark.
The Art of Wrapping Ribs for Ultimate Tenderness
After a few hours of initial smoking, it’s time for the “wrap” phase – a crucial step for achieving incredibly tender, succulent ribs. While some pitmasters prefer a “naked” cook for a firmer bite and robust bark, wrapping offers several benefits, especially for home grillers seeking that perfect fall-off-the-bone experience.
Why Wrap Your Ribs?
- Accelerated Tenderness: Wrapping the ribs tightly in foil creates a mini-steam bath, helping to break down tough connective tissues much faster than cooking unwrapped. This significantly speeds up the tenderizing process.
- Moisture Retention: The foil traps moisture and juices, preventing the ribs from drying out during the longer cooking phase.
- Flavor Infusion: This is your chance to add an extra layer of flavor. Ingredients like butter, brown sugar, and honey melt into the ribs, creating a rich, sweet, and sticky coating.
- “Breaking the Stall”: During low and slow cooking, meat often experiences a “stall” where its internal temperature plateaus for an extended period. Wrapping helps push past this stall, getting you to dinner faster.
The Wrapping Process (The “Texas Crutch”)
After your ribs have smoked for 2-3 hours at 250-275°F and developed a nice color, it’s time to wrap them. Here’s how Dad does it, and how you can replicate his success:
- Prepare Your Foil: Lay out a large piece of heavy-duty aluminum foil (or two layers of regular foil for extra strength). Ensure it’s big enough to fully enclose the rack of ribs.
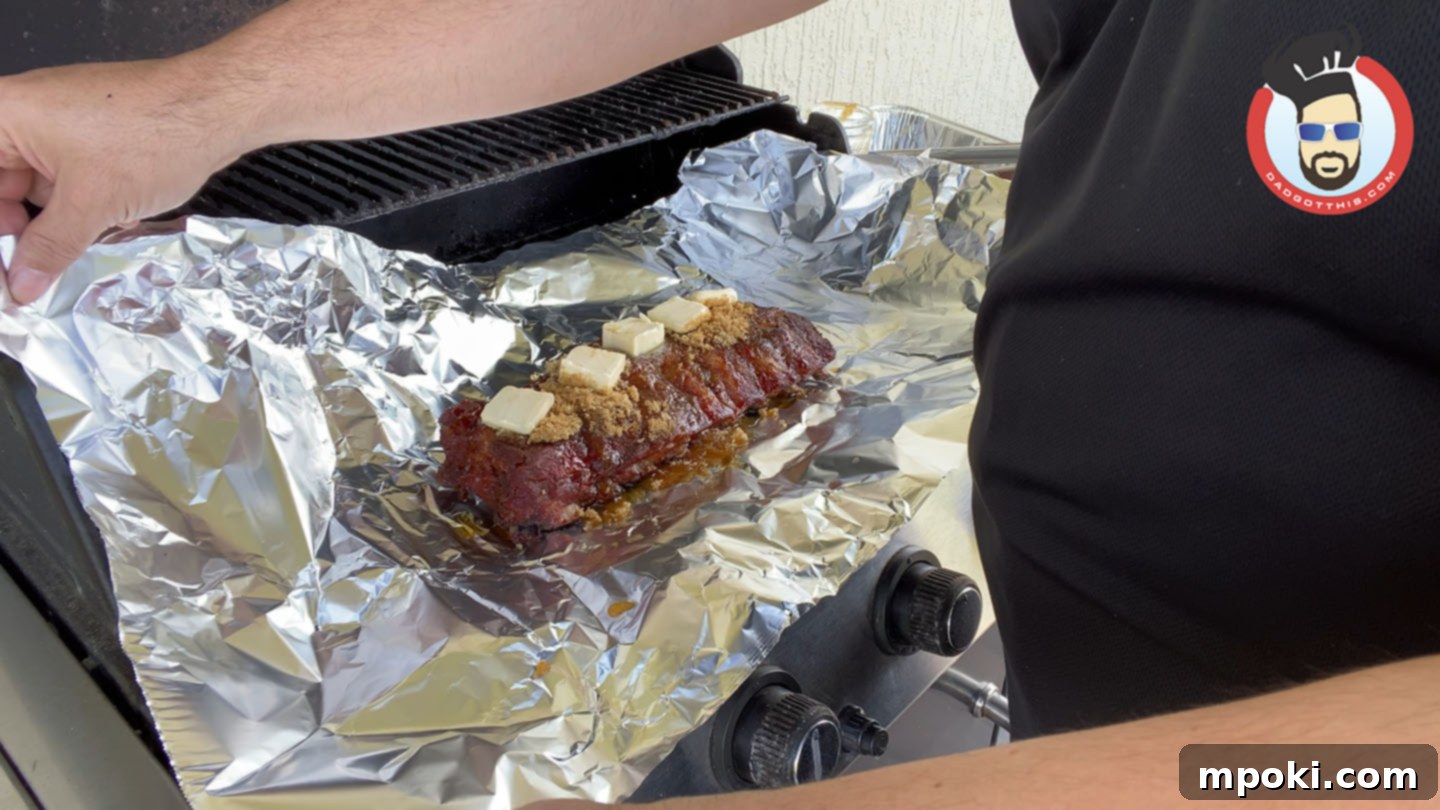
- Add Flavor Enhancers: Place the ribs meat-side up on the foil. Now, generously add your flavor enhancers:
- Butter: Slice half a stick of butter into pats and distribute them over the ribs. Butter adds richness and helps with moisture.
- Brown Sugar: Sprinkle about ½ cup of brown sugar evenly over the ribs. This contributes sweetness and aids in caramelization.
- Honey: Drizzle ⅛ cup of honey across the surface. Honey adds another layer of sweetness and stickiness.
- Optional Liquid: Some people add a splash of apple juice, cider, or even beer to the foil packet for extra moisture.
- Seal Tightly: Carefully fold the foil around the ribs, sealing all edges tightly to prevent any juices or steam from escaping. A good seal is crucial for the steaming effect. You want a snug packet, not a loose one.
- Increase the Heat: Return the wrapped ribs to the indirect side of your grill. At this point, you can slightly increase your grill temperature to 300-350°F (150-175°C). The higher temperature helps further break down the collagen and speeds up tenderness without drying out the protected ribs.
- Cook to Tenderness: Let the wrapped ribs cook for another 1-2 hours. The exact time will depend on the thickness of your ribs and your desired tenderness level.
The Grand Finale: Glaze and Finish Your BBQ Ribs
The final stage of cooking your Weber Kettle Ribs is all about setting the glaze and achieving that perfect barbecue finish. After the ribs have been wrapped and cooked to tender perfection, it’s time to unveil them and give them their crowning glory – a rich, caramelized BBQ sauce coating.
Unwrap and Apply the Glaze
Carefully remove the ribs from their foil package. Be cautious, as there will be hot steam and accumulated juices. Discard the foil and any remaining liquid (or save it for a delicious sauce base if you wish!). Place the unwrapped ribs back on the indirect side of your Weber Kettle grill.
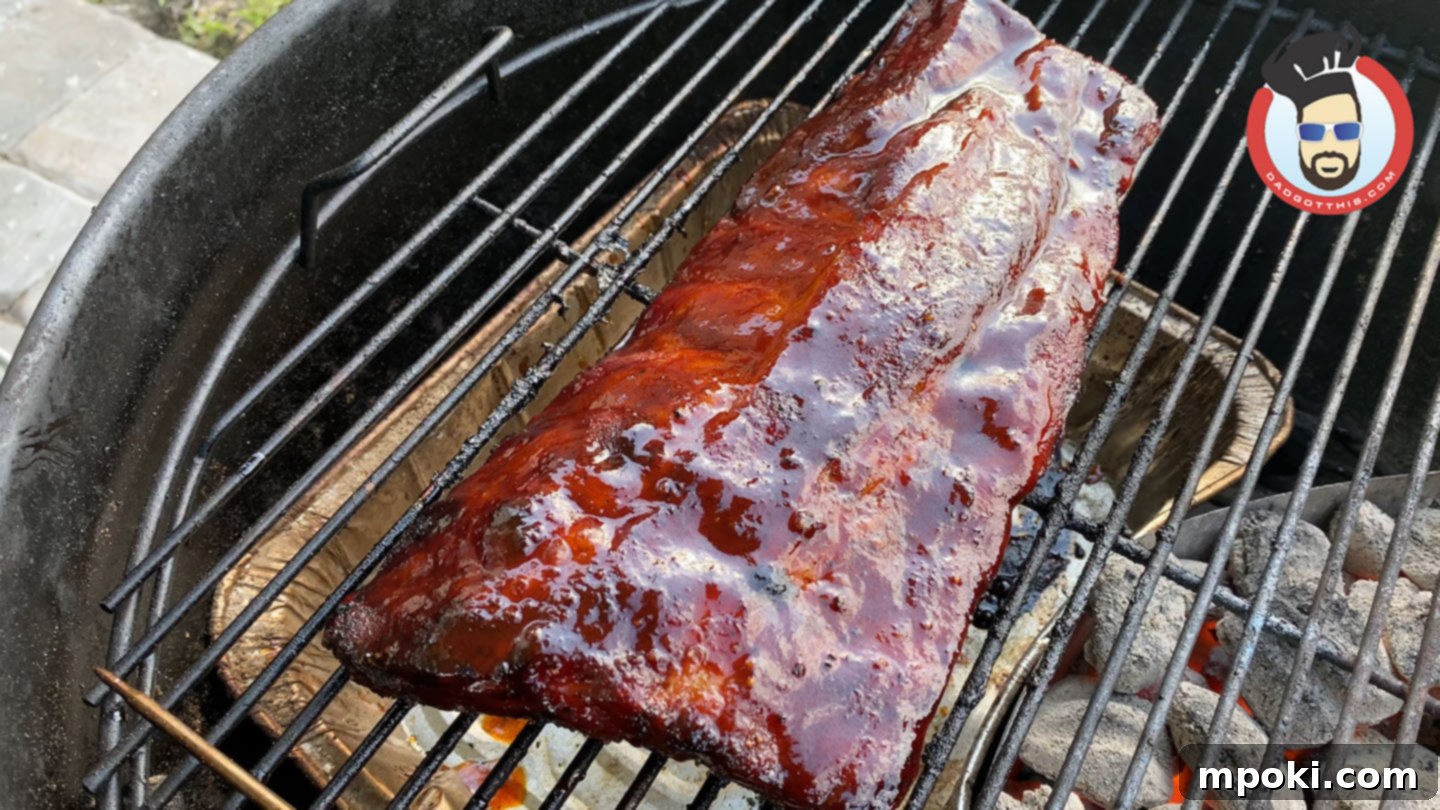
Now, it’s time to baste them with your favorite BBQ sauce. Whether you prefer a smoky, tangy, sweet, or spicy sauce, this is where you customize the flavor profile to your liking. Dad loves to make his own homemade BBQ sauce; you can find his easy BBQ sauce recipe here. Use a brush to apply a generous and even coating of sauce over all surfaces of the ribs.
Setting the Sauce
Once glazed, let the ribs cook on the indirect side for another 30 minutes to one hour. During this time, the sauce will “set” – it will caramelize slightly, thicken, and create a beautiful, glossy, and slightly tacky finish. Keep a close eye on them to prevent the sauce from burning, especially if it’s very sugary. The heat should still be moderate, around 275-300°F (135-150°C), to allow the sauce to set without scorching. This final step enhances the visual appeal and adds a delightful textural contrast to the tender meat underneath.
The exact cooking time in this final stage will depend on several factors: how thick your sauce is, how quickly it sets, and, of course, how hungry everyone is! Look for a beautiful, deep mahogany color and a sauce that has firmly adhered to the ribs.
Knowing When Your Smoked Ribs Are Perfectly Done
Determining when your smoked ribs are perfectly done is more about feel and appearance than a specific internal temperature. While an internal temperature around 195-203°F (90-95°C) often indicates tenderness, focusing on these visual and physical cues will guarantee exceptional results every time.
Key Indicators of Doneness:
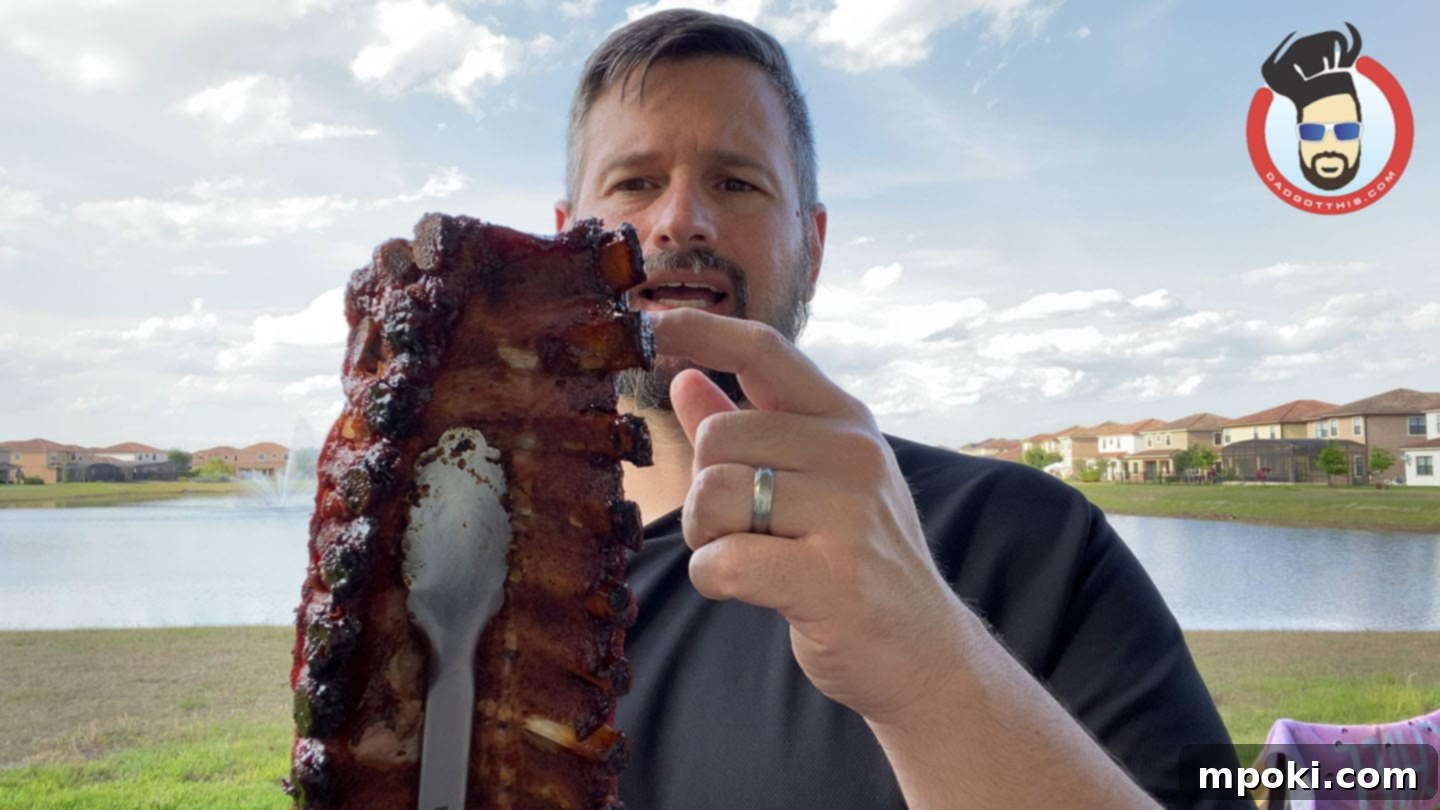
- The Bone Pullback Test: This is one of the most reliable visual cues. As ribs cook, the meat contracts and pulls back from the bone ends. When you see a nice section of bone exposed – typically about a quarter to half an inch – it’s a strong indicator that your ribs are ready.
- The Bend Test: Pick up a rack of ribs with tongs in the middle. The rack should bend significantly, almost to the point of breaking, without actually falling apart. If they’re stiff, they need more time. If they completely flop and fall apart, they might be slightly overcooked (though still delicious!).
- The Toothpick/Probe Test: Gently insert a toothpick or a skewer into the meat between the bones. It should slide in with very little resistance, feeling like it’s going into soft butter. If you feel any significant resistance, keep cooking.
- Meat Separation: When gently twisted, the meat should separate easily from the bone, but ideally not fall off entirely with a light shake. Most pitmasters aim for ribs that are tender enough to pull cleanly from the bone with a gentle tug, rather than literally falling off before you even bite into them.
Once your ribs exhibit these signs of doneness, carefully remove them from the grill. Place them on a cutting board, tent loosely with foil, and allow them to rest for at least 10-15 minutes before slicing. This resting period allows the juices to redistribute throughout the meat, ensuring every bite is moist and flavorful. Then, slice between the bones and serve your perfectly smoked Weber Kettle Ribs with pride!
No Grill? No Problem! Baking Ribs in Your Oven
Don’t have a Weber Kettle or any outdoor grill? You can still achieve incredibly tender and delicious ribs right in your kitchen oven! The principles of low and slow cooking, seasoning, and wrapping remain the same, ensuring a fantastic meal even without the smoky char of a grill. While you’ll miss the distinct charcoal smoke flavor, you can still produce succulent pork ribs that are bursting with flavor.
The oven method is straightforward and follows the core steps of our grilled recipe. You’ll simply be using your oven as your controlled heat source instead of a charcoal grill. Here’s a brief overview of how to adapt the process:
- Preparation is Identical: Start by prepping your baby back ribs exactly as described. This means removing the silver skin and applying your favorite dry rub (Dad’s blend of garlic powder, onion powder, sea salt, black pepper, and paprika works wonders here!).
- Initial Oven Cook: Place the seasoned ribs on a wire rack set inside a foil-lined baking sheet. The rack ensures even air circulation around the ribs, similar to a grill. Cook in a preheated 275°F (135°C) oven for approximately 3 hours.
- The Oven Wrap: After the initial cook, take the ribs out of the oven and wrap them in heavy-duty aluminum foil with butter, brown sugar, and honey, just like in the grilling method. This steaming process is vital for tenderness.
- Adding Smoky Flavor (Optional): If you crave a smoky essence in your oven-baked ribs, this is the perfect time to add it. Drizzle about 1 teaspoon of liquid smoke evenly over the ribs before sealing the foil packet. Be careful not to overdo it, as liquid smoke is potent.
- Finish in the Oven: Increase your oven temperature to 350°F (175°C) and return the wrapped ribs for another 1.5 to 2 hours. This slightly higher temperature helps further tenderize the ribs.
- Glaze and Final Bake: Unwrap the ribs, discard the foil, and baste them generously with your favorite BBQ sauce. Return them to the oven (still on the wire rack and baking sheet) for an additional 30 minutes to an hour, or until the sauce is caramelized and tacky, and the ribs have reached your desired tenderness.
- Rest and Serve: As with grilled ribs, let them rest for at least 10 minutes after cooking to redistribute juices before slicing and serving.
The full, detailed oven instructions are conveniently included in the notes section of the recipe card below, ensuring you have all the information you need for perfect oven-baked ribs. So, even without a grill, you can enjoy incredibly succulent and flavorful ribs at home!
Weber Kettle Smoked Ribs
Print
Pin
Rate
Equipment
- Charcoal Grill (Weber Kettle recommended)
- Spray Bottle
- Apple wood chunks (or other preferred smoking wood)
- Charcoal (briquettes or lump)
- Heavy-Duty Aluminum Foil
- Grill Thermometer (for accurate temperature monitoring)
Ingredients
For the Ribs & Rub
- 3 lb Pork baby back ribs (1-2 racks)
- 1 tablespoon Garlic powder
- 1 tablespoon Onion powder
- 1 tablespoon Sea salt
- 1 tablespoon Black pepper
- 1 tablespoon Paprika
For the Wrap & Glaze
- ½ Stick Unsalted Butter
- ½ Cup Brown sugar
- ⅛ Cup Honey
- 1 Cup Apple Juice (for spraying/misting)
- 1 Cup Your favorite BBQ sauce
Instructions
Grill Instructions (Weber Kettle)
- Begin by removing the silver skin (tough membrane) from the backside of each rack of ribs. Use a sharp knife or spoon handle to lift a corner, then grip with a paper towel and pull steadily to remove.
- Generously coat all sides of the ribs with your dry rub mixture: garlic powder, onion powder, sea salt, black pepper, and paprika. Gently pat the rub onto the meat to ensure it adheres well. Allow ribs to rest for at least 30 minutes, or ideally, an hour in the refrigerator.
- Set up your Weber Kettle for indirect grilling/smoking. Create a 2-zone setup by placing charcoal on one side of the lower grate and a water pan on the other. Add a few wood chunks (e.g., apple wood) to the lit charcoal for smoke flavor. Aim for a consistent grill temperature of 250-275°F (120-135°C).
- Place the seasoned ribs on the indirect side of the grill (over the water pan). Close the lid and smoke for 2-3 hours, maintaining your target temperature. Every 30-45 minutes, open the grill briefly and mist the ribs with apple juice (or a 50/50 water/apple cider vinegar mix) using a spray bottle to keep them moist and develop a nice bark.
- After 2-3 hours, remove the ribs from the grill. Lay out a large piece of heavy-duty aluminum foil. Place the ribs meat-side up on the foil, then top with ½ stick of butter (sliced), ½ cup brown sugar, and ⅛ cup honey. Carefully wrap the ribs tightly, sealing all edges to create a steam packet.
- Return the wrapped ribs to the indirect side of the grill. Increase the grill temperature to 300-350°F (150-175°C). Cook for an additional 1-2 hours until the ribs are very tender (meat should pull back from the bone ends significantly).
- Carefully unwrap the ribs, discarding the foil. Place them back on the indirect side of the grill. Baste generously with your favorite BBQ sauce. Close the lid and cook for another 30-60 minutes, allowing the sauce to set and caramelize into a delicious glaze. Watch closely to prevent burning.
- Once glazed and tender, remove the ribs from the grill. Let them rest on a cutting board, tented loosely with foil, for at least 10-15 minutes before slicing and serving. Enjoy your perfectly smoked Weber Kettle Ribs!
Video
Notes
- Preheat your oven to 275°F (135°C). Prepare the ribs by removing the silver skin and applying the dry rub, exactly as described in steps 1 and 2 of the grill instructions.
- Place the seasoned ribs on a wire rack set inside a foil-lined baking sheet. Cook in the preheated oven for 3 hours.
- After 3 hours, remove the ribs from the oven. Wrap them in heavy-duty aluminum foil with ½ stick butter, ½ cup brown sugar, and ⅛ cup honey. For a smoky flavor, you can add 1 teaspoon of liquid smoke over the ribs before sealing the foil packet.
- Increase the oven temperature to 350°F (175°C). Return the wrapped ribs to the oven and cook for an additional 1.5 to 2 hours.
- Carefully unwrap the ribs, discard the foil, and place them back on the wire rack over the baking sheet. Baste generously with your favorite BBQ sauce. Return to the oven for an additional 30 minutes to one hour, or until the sauce is caramelized and the ribs reach your desired tenderness.
- Let the ribs rest for at least 10 minutes after cooking before slicing and serving.
Nutrition
 Tried this recipe?Mention @DadGotThis or tag #DadGotThis!
Craving More? Explore Dad’s Other Delicious Recipes!
If you loved making these smoked Weber Kettle Ribs, you might be interested in some of Dad’s other popular recipes and cooking adventures. Expand your culinary skills and discover new favorites with these recommendations:
Looking for the Original Dalgona Coffee Recipe?
Revisit a viral sensation with a classic twist! Dad’s original Dalgona Whipped Coffee Recipe offers a frothy, delightful coffee experience that’s easy to make and incredibly satisfying. Try it out and then compare it to the mocha version to see which whipped coffee creation you like better!
Did You Know Dad Got This is on YouTube?
For visual learners and cooking enthusiasts, Dad brings his culinary expertise to life on his YouTube channel. Head over to subscribe and explore a wide array of engaging cooking videos, helpful grilling tips, and all sorts of delicious food-related content designed to inspire your next meal.
