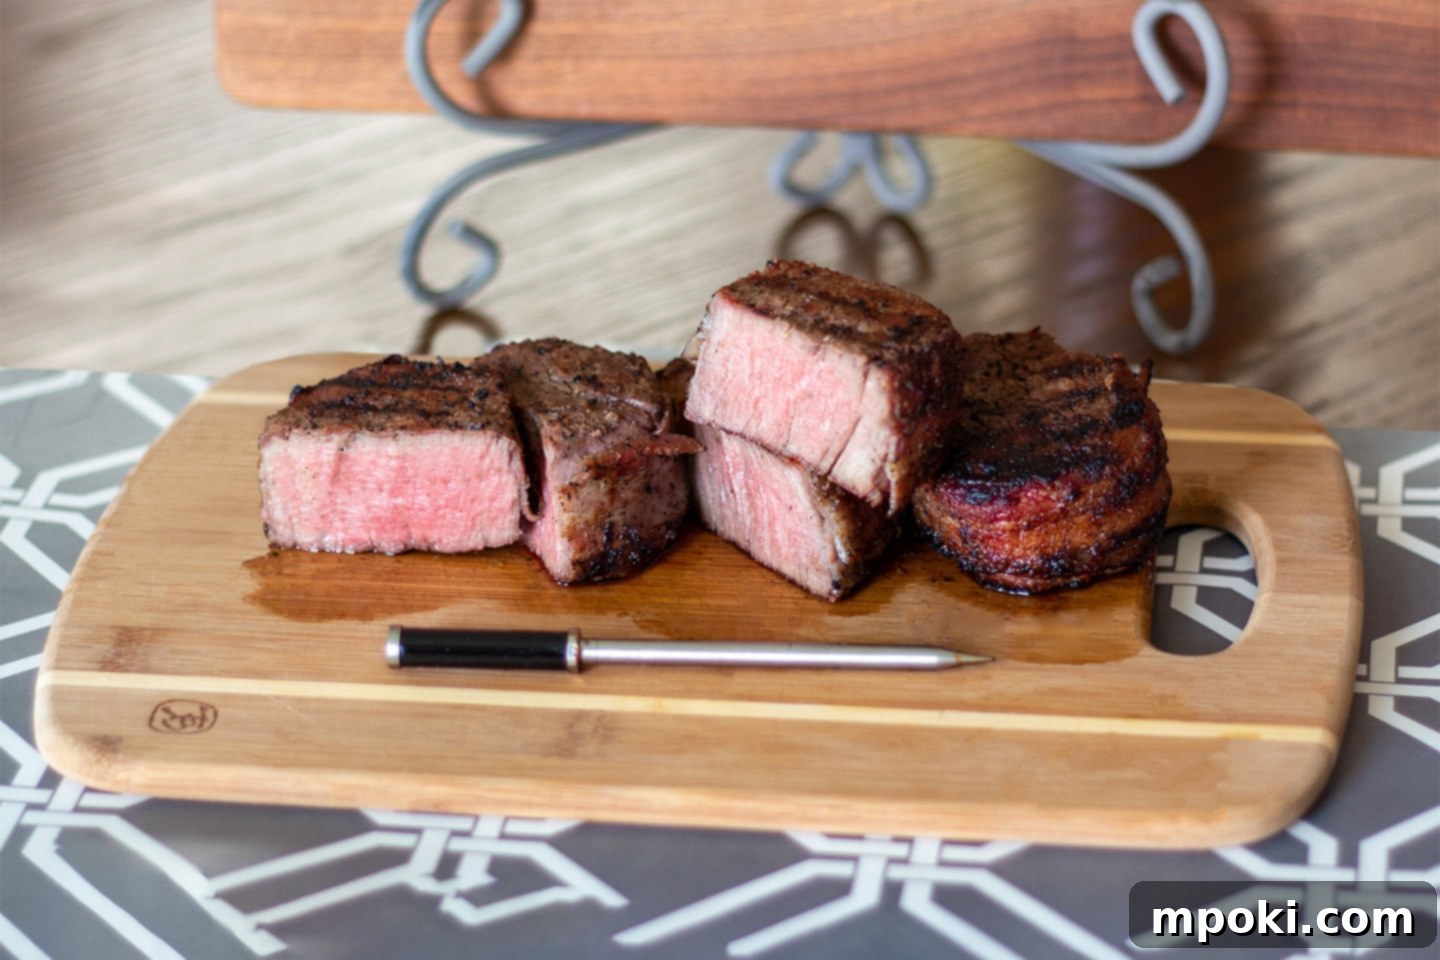
Mastering the Grill: How to Cook Bacon-Wrapped Filet Mignon with Reverse Sear
Prepare to elevate your grilling game! This comprehensive guide will walk you through the art of cooking a succulent bacon-wrapped filet mignon on a charcoal grill using the superior reverse sear method. Filet mignon, renowned for its incredible tenderness and lean profile, is often considered a gourmet choice, making it a favorite for special occasions or when you simply crave an exceptionally delicious steak. While cooking such a premium cut might seem daunting, especially achieving that perfect medium-rare doneness with a delightful crust, rest assured, you’ll master it with these easy-to-follow steps.
Forget complicated techniques like Sous Vide or other elaborate preparations. This recipe focuses on simplicity and maximizing flavor using fundamental grilling principles and one essential tool: a reliable meat thermometer. By embracing the reverse sear and the smoky goodness of a charcoal grill, you’re set to create an unforgettable steak experience.
This Page Contains Affiliate Links. For more Info See My Disclosures here.
Unlock Unrivaled Flavor with Reverse Sear on a Charcoal Grill
The reverse sear is not just a technique; it’s a revelation for steak lovers, consistently delivering a juicy, perfectly cooked interior and an irresistible, savory crust. While it can be executed in an oven, opting for a charcoal grill adds an unparalleled depth of smoky flavor that truly elevates bacon-wrapped filet mignon. The beauty of the reverse sear lies in its straightforward approach, yet its results are anything but ordinary.
The core concept involves a two-phase cooking process. First, the steak is gently cooked at a lower, indirect temperature until it reaches approximately 20-25 degrees Fahrenheit below your desired final doneness. This slow cooking allows the heat to penetrate the meat evenly, minimizing the grey band often associated with traditional high-heat searing and ensuring edge-to-edge perfection. The second phase involves a rapid, high-heat sear, creating a rich, caramelized crust through the Maillard reaction. This method locks in moisture and develops complex flavors on the exterior without overcooking the tender interior.
Choosing a charcoal grill for your reverse sear provides distinct advantages. The intense radiant heat from the coals, coupled with the subtle infusion of wood smoke, imparts a unique, robust flavor that gas grills simply can’t replicate. It’s the ideal environment to achieve that sought-after charred exterior while ensuring the delicate filet mignon remains incredibly tender and moist inside.
Precision is Key: The Indispensable Role of a Meat Thermometer

Attempting a perfect reverse sear, especially with a premium cut like filet mignon, without a reliable meat thermometer is akin to flying blind. The “feel test” or guessing based on cooking time simply won’t suffice when precision is paramount. A good quality meat thermometer is your absolute best friend in the kitchen (or by the grill), guaranteeing that your steak reaches the exact doneness you desire every single time.
For those serious about their grilling, an advanced option like The MeatStick Wireless Meat Thermometer offers exceptional convenience, allowing you to monitor internal temperatures remotely without constantly opening the grill lid and losing precious heat. This is particularly beneficial during the slow-cooking phase of the reverse sear. However, even if a wireless model isn’t in your budget, a high-quality instant-read thermometer is a non-negotiable tool. It provides quick and accurate temperature readings, enabling you to make timely adjustments and pull your steaks off the heat at precisely the right moment.
Investing in a good meat thermometer isn’t just about avoiding undercooked or overcooked meat; it’s about unlocking the full potential of your ingredients and ensuring consistently perfect results, transforming challenging cooks into effortless triumphs.
The Art of Wrapping: Elevating Your Filet with Bacon
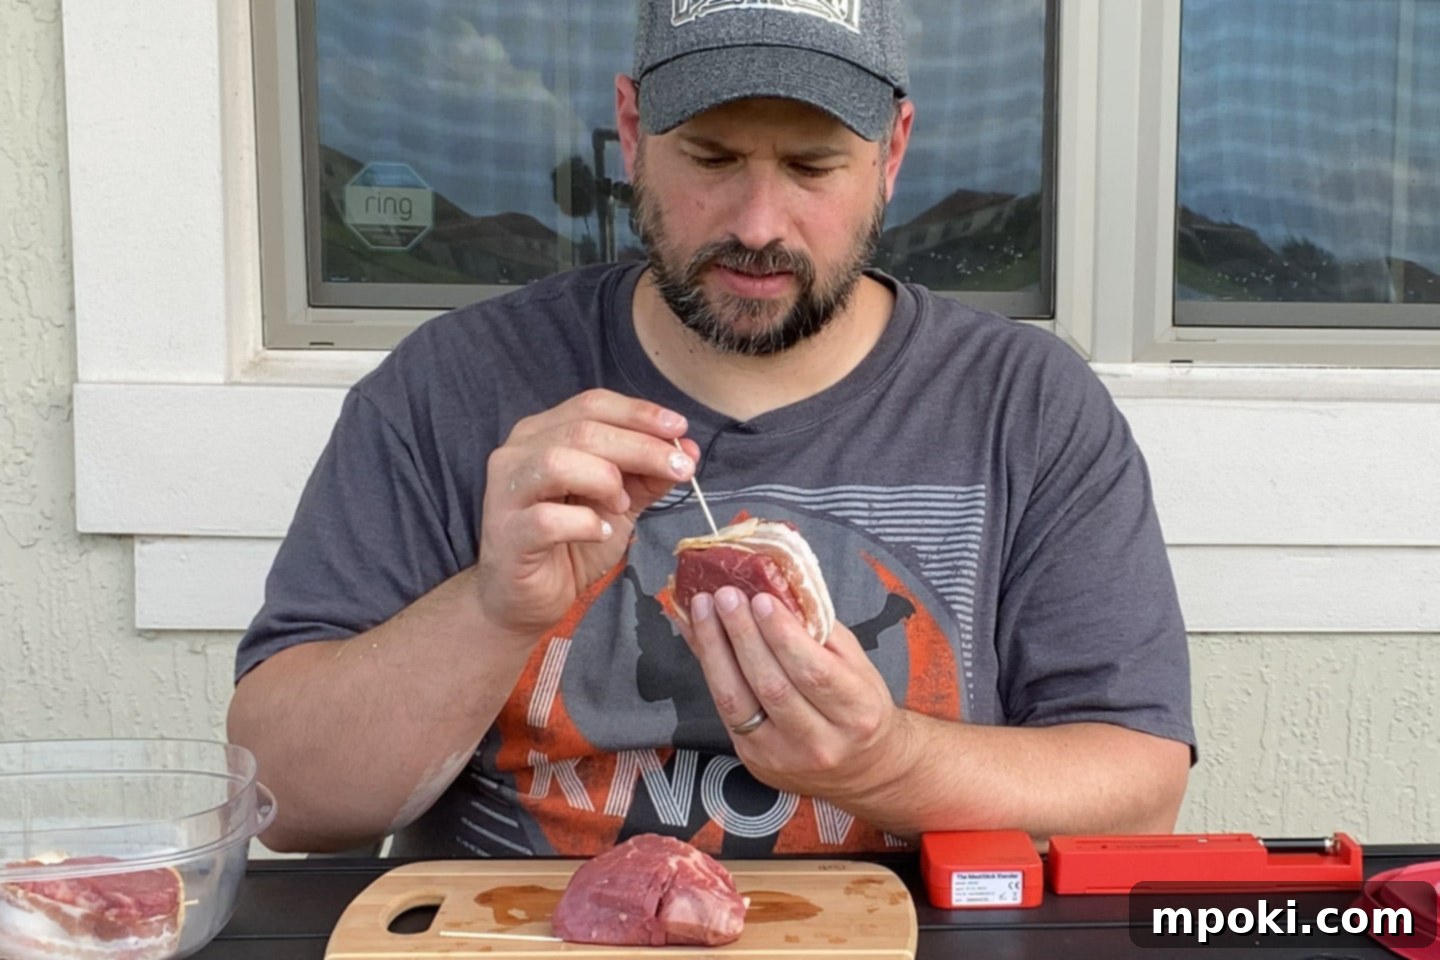
Bacon-wrapped filet mignon is a classic combination, and for good reason. The bacon not only adds a rich, savory flavor and a crispy texture but also helps to keep the lean filet moist during cooking. The key to successful bacon wrapping lies in the type of bacon you choose and how you secure it.
Always opt for a thinner cut of bacon. Thick-cut bacon, while delicious on its own, takes considerably longer to crisp up and cook through. By the time thick-cut bacon is perfectly rendered and crispy, your delicate filet mignon is likely to be overcooked. Thin-cut bacon, on the other hand, cooks at a rate more in sync with the steak, ensuring both components reach their ideal texture simultaneously.
To wrap, take one slice of thin-cut bacon and carefully encircle the perimeter of each filet, ensuring it covers the sides of the steak. Secure the bacon firmly in place with a wooden toothpick or two. This prevents the bacon from unraveling during the grilling process, keeping it snug against the steak to impart its flavor and render properly. The goal is a beautifully presented steak with a crispy, flavorful bacon embrace.
Simple Seasoning for Maximum Flavor
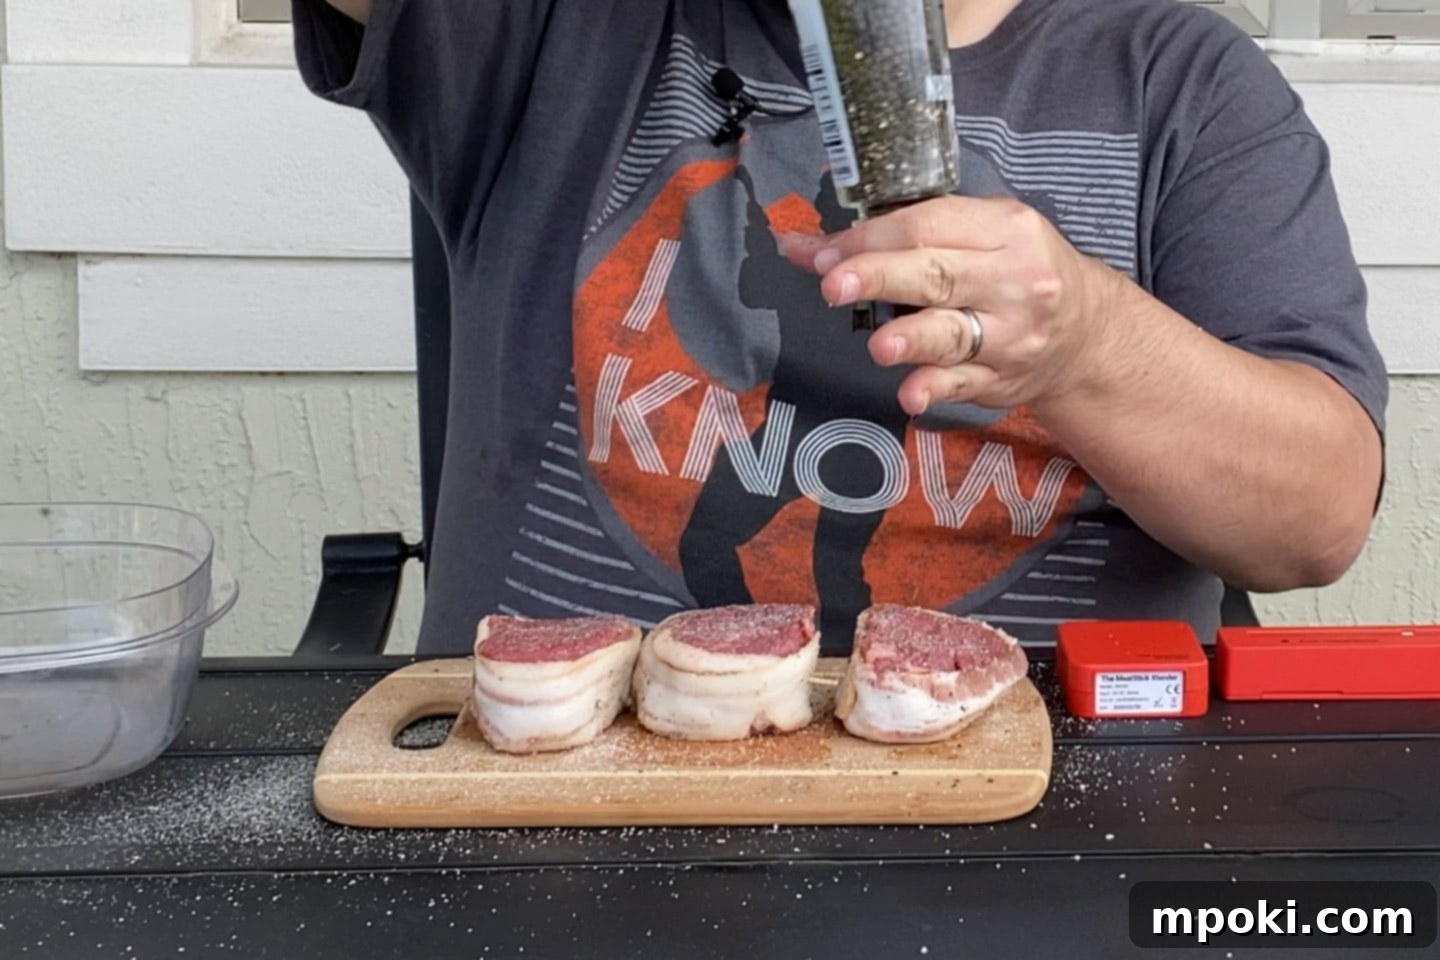
When cooking a high-quality cut like filet mignon, especially when paired with flavorful bacon, less is often more when it comes to seasoning. The aim is to enhance, not overpower, the natural deliciousness of the beef and the savory notes of the bacon. A simple yet effective blend of staple seasonings will bring out the best in your steak without masking its inherent qualities.
Generously dust each bacon-wrapped filet with a balanced mixture of garlic powder, onion powder, sea salt, and freshly ground black pepper. These seasonings are culinary workhorses, providing aromatic depth and savory notes that complement beef perfectly. The garlic and onion powders offer a subtle background flavor, while the salt is crucial for tenderizing and bringing out the meat’s natural juices. Black pepper adds a gentle kick and aromatic complexity. Feel free to adjust the quantities to your personal preference, but remember to be mindful of the bacon’s inherent saltiness. Apply the seasoning evenly to all surfaces of the steak, ensuring every bite is bursting with flavor.
The Foundation of Reverse Sear: Setting Up Your Grill for 2-Zone Cooking
Two-zone cooking is the cornerstone of the reverse sear method, allowing you to control temperatures precisely and execute both the low-and-slow cook and the high-heat sear effectively. This setup divides your grill into two distinct temperature zones: a direct heat zone (hot side) and an indirect heat zone (cold side).
For a charcoal grill, creating two zones is straightforward. Begin by starting your charcoal using your preferred method, such as a chimney starter for quick and efficient ignition. Once the coals are fully ash-covered and glowing hot, carefully transfer them to one side of your grill’s charcoal grate. Charcoal baskets can be incredibly useful here, helping to contain the coals and maintain a distinct boundary between the hot and cold zones. Leave the other side of the grate empty, creating your indirect cooking area. Ensure your grill vents are open enough to allow sufficient airflow for the coals to burn and maintain temperature, but also to allow some control over the heat.
If you’re using a gas grill, setting up for two-zone cooking is even simpler. Just ignite the burners on one side of the grill to high heat, leaving the burners on the other side completely off. This creates your direct and indirect zones, respectively. Allow your grill to preheat thoroughly with the lid closed until the indirect side reaches a stable temperature, typically around 225-275°F (107-135°C) for the slow cook.
Mastering this grill setup is crucial for the reverse sear, providing the versatility needed to achieve a perfectly cooked interior before developing that incredible crust.
The Gentle Beginning: Cooking on the Cold Side
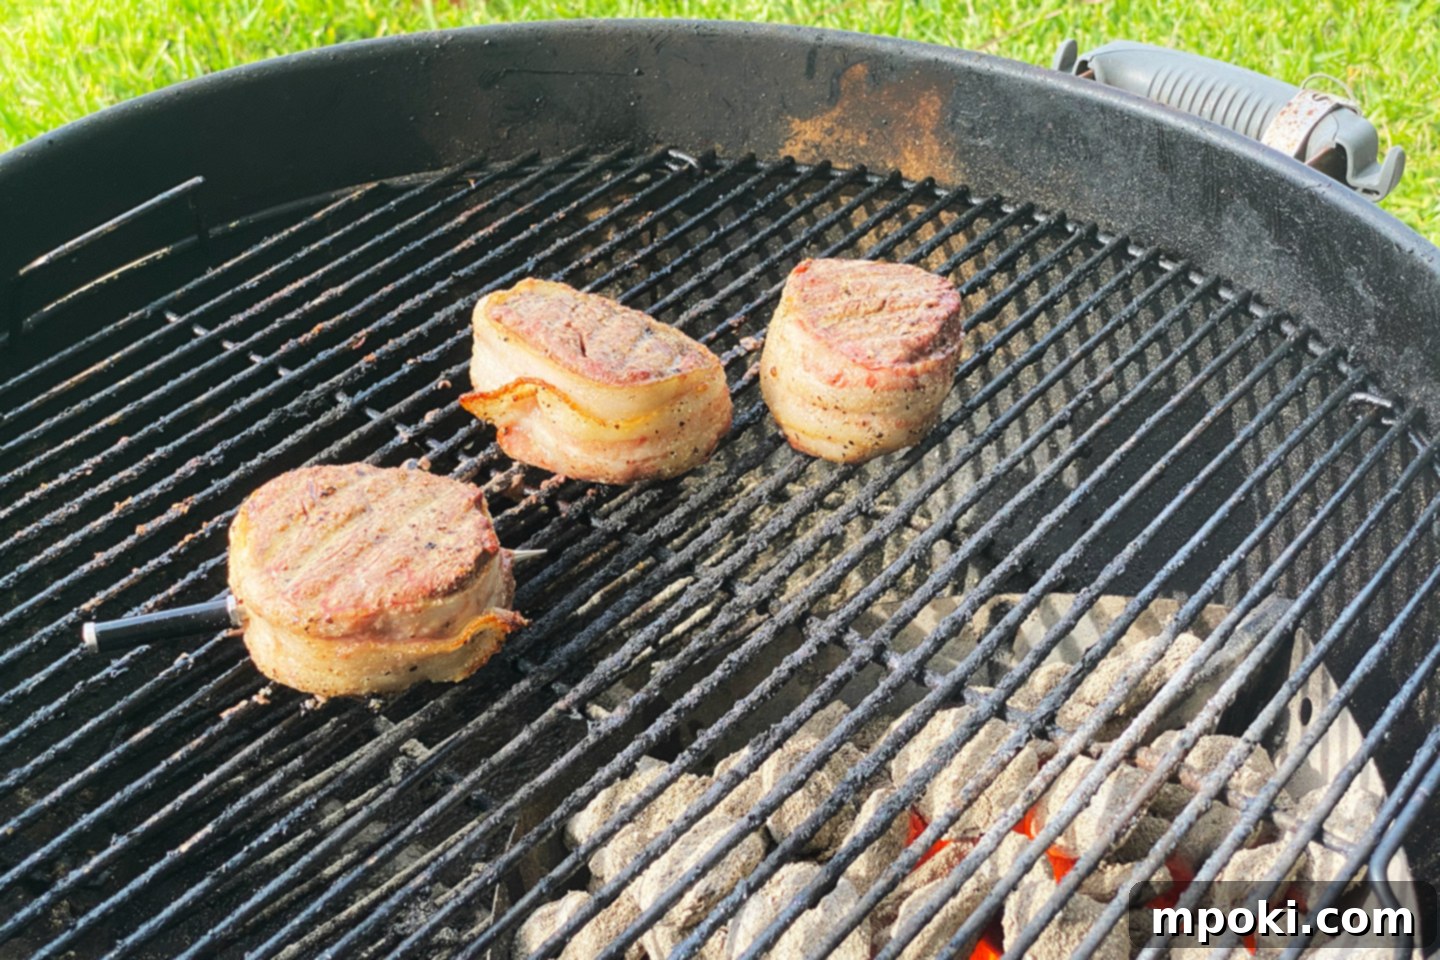
With your grill expertly set up for two-zone cooking, it’s time to begin the gentle cooking phase of the reverse sear. Place your seasoned, bacon-wrapped filets directly on the indirect heat side of the grill – the side furthest away from the hot coals or active burners. Close the grill lid to allow the ambient heat to slowly and evenly raise the internal temperature of the steaks.
This is where your meat thermometer becomes your most invaluable asset. Insert the probe into the thickest part of one of the steaks, ensuring it doesn’t touch the bacon or any bone (if applicable). Monitor the internal temperature closely. The goal here is to cook the steaks until they reach approximately 20 degrees Fahrenheit below your desired final serving temperature. This revised target accounts for “carryover cooking,” a phenomenon where the internal temperature of the meat continues to rise after it’s removed from the heat source.
Understanding carryover cooking is critical for achieving perfect doneness. When testing The MeatStick Thermometer, we observed that pulling steaks at 20 degrees shy of the target allowed for optimal carryover, resulting in the ideal final temperature and moisture retention. For example, if your ultimate goal is a medium-rare steak at 135°F (57°C), you should aim to remove the steaks from the indirect heat once they reach an internal temperature of 115°F (46°C). You can flip and rotate the steaks periodically if you wish, but since they’re not exposed to direct flame, this isn’t strictly necessary for even cooking during this phase.
Here’s a quick guide to internal temperatures for different doneness levels, along with the corresponding “pull” temperature for the cold side (accounting for carryover):
- Rare: 125°F (52°C) final → Pull at 105°F (40°C)
- Medium-Rare: 135°F (57°C) final → Pull at 115°F (46°C)
- Medium: 140°F (60°C) final → Pull at 120°F (49°C)
- Medium-Well: 145°F (63°C) final → Pull at 125°F (52°C)
- Well-Done: 150°F (66°C) final → Pull at 130°F (54°C)
Once your steaks hit that crucial indirect pull temperature, they’re ready for the exciting next step: the high-heat sear!
The Grand Finale: Searing for an Unforgettable Crust

After their gentle journey on the cold side of the grill, your bacon-wrapped filets are perfectly primed for their fiery finish. It’s time to move them over to the hot side, directly above the blazing coals or roaring burners. This is where the magic of the Maillard reaction unfolds, creating that coveted deep-brown, flavorful crust that every steak enthusiast dreams of.
For an extra boost of flavor and to help promote those desirable flare-ups that add char and a rustic finish, lightly drizzle a touch of olive oil directly onto the steaks as they sizzle over the direct heat. The goal of this searing phase is to develop a beautiful crust quickly, without significantly raising the internal temperature of the steak too much further. This is a rapid process, typically lasting only a few minutes per side.
Feel free to flip and turn the steaks frequently – every 30 to 60 seconds – to ensure even searing and prevent any single spot from burning. This frequent turning helps distribute the heat, allowing for a more uniform crust. Keep a close eye on them; the high heat can quickly turn a perfect sear into a burnt mess. Continue searing until the bacon is crispy and golden, and the steak’s surface is caramelized to your liking. Some prefer a lighter crust, while others crave a more pronounced “burnt” char – adjust to your preference.
Once the steak reaches approximately 10 degrees Fahrenheit from its final desired serving temperature (e.g., for medium-rare at 135°F, pull at 125°F), it’s time to remove them from the grill. Place them on a cutting board or platter and tent them loosely with foil. This crucial “resting” period, lasting at least 10 minutes, allows the muscle fibers to relax and reabsorb the juices, ensuring a supremely tender and moist steak. Skipping this step can result in a dry steak, as all the delicious juices will run out when you cut into it. During this rest, carryover cooking will gently bring your steaks to their perfect final internal temperature.
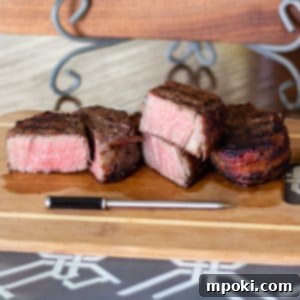
Grilled Bacon Wrapped Filet Mignon
Print
Pin
Main Course
American
bacon wrapped, filet mignon, how to cook steak
5 minutes
30 minutes
10 minutes
4
855
kcal
Dad
Equipment
- Grill, charcoal or propane
- Meat thermometer
- Toothpicks
Ingredients
- 32 oz Filet Mignon (Eight 4 oz steaks) 1.75 to 2 inches thick
- 4 slices Bacon
- 1 tablespoon Garlic powder
- 1 tablespoon Onion Powder
- 1 tablespoon Black pepper
- 1 tablespoon Sea Salt
- 4 tablespoon Extra virgin olive oil
Instructions
- Set up your grill for indirect cooking. If you are using a charcoal grill, arrange the coals to one side of the grill for a hot zone and a cool zone. Preheat your grill to an indirect temperature of 225-275°F (107-135°C).
- Wrap 1 slice of thin-cut bacon around the edge of each steak and secure it using a toothpick. Season all sides of the steaks generously with garlic powder, onion powder, salt, and pepper.
- Place the steaks on the cold (indirect) side of the grill, away from the direct heat source. Insert a meat thermometer into the thickest part of a steak. Cook until the internal temperature reaches 20 degrees Fahrenheit from your desired final serving temperature (e.g., 115°F for medium-rare, which aims for a final 135°F). Flipping is optional during this phase.
- Once the steaks reach their initial target temperature, move them to the hot (direct) side of the grill, directly over the coals or active burners. Drizzle lightly with extra virgin olive oil. Sear for 1-2 minutes per side, flipping frequently to achieve a beautiful, crispy crust and perfectly rendered bacon. Remove the steaks when they reach 10 degrees Fahrenheit from the desired final temperature (e.g., 125°F for medium-rare).
- Transfer the steaks to a cutting board and let them rest for at least 10 minutes, tented loosely with foil. This allows for carryover cooking to bring them to their final temperature and for the juices to redistribute, ensuring a tender and moist steak. Slice and serve immediately.
Video
Nutrition
Serving: 8oz
|
Calories: 855kcal
|
Carbohydrates: 4g
|
Protein: 45g
|
Fat: 72g
|
Saturated Fat: 25g
|
Cholesterol: 173mg
|
Sodium: 2004mg
|
Potassium: 799mg
|
Fiber: 1g
|
Sugar: 1g
|
Vitamin C: 1mg
|
Calcium: 29mg
|
Iron: 6mg

Tried this recipe?
Mention @DadGotThis or tag #DadGotThis!
Dive Deeper: Enhance Your Grilling Skills with Our Videos
To truly visualize and master the techniques discussed, sometimes seeing is believing! We encourage you to watch our detailed unboxing and review of The MeatStick Wireless Meat Thermometer. This video provides an in-depth look at how this advanced tool can simplify your grilling process and ensure perfect results every time.
Beyond this review, our YouTube channel is a treasure trove of valuable cooking videos and food-related content. Whether you’re looking for more grilling tutorials, kitchen hacks, or just culinary inspiration, you’ll find a wealth of information designed to help you become a more confident and skilled cook. Don’t miss out on tips and tricks to make every meal a success.
