← Back To The Instant Pot Basics Page

Mastering Your Instant Pot: A Beginner’s Step-by-Step Guide
Have you recently acquired an Instant Pot and found yourself wondering, “How do I use this thing?” If you’ve scoured Google for answers and landed here, then congratulations – you’re exactly where you need to be! The Instant Pot has revolutionized kitchens worldwide, transforming complex recipes into quick, effortless meals. For busy parents like Dad, it’s more than just a gadget; it’s a game-changer, making healthy home-cooked food accessible even on the busiest weekdays.
This comprehensive guide is designed to walk you through the absolute essentials, empowering you to use your Instant Pot with confidence. We’ll cover everything from understanding its key components to performing your first cooking cycle. Whether you’re aiming to whip up a quick weeknight dinner or experiment with new recipes, this guide will provide the foundational knowledge you need. If you’re completely new to the world of electric pressure cooking and want a primer on what an Instant Pot actually is and how it functions, we recommend starting with our “What is an Instant Pot?” guide. Once you’re acquainted, come right back here to dive into the practical “how-to.”
This page contains affiliate links. For more information, please see our disclosures here.
Understanding Your Instant Pot: Key Components Explained
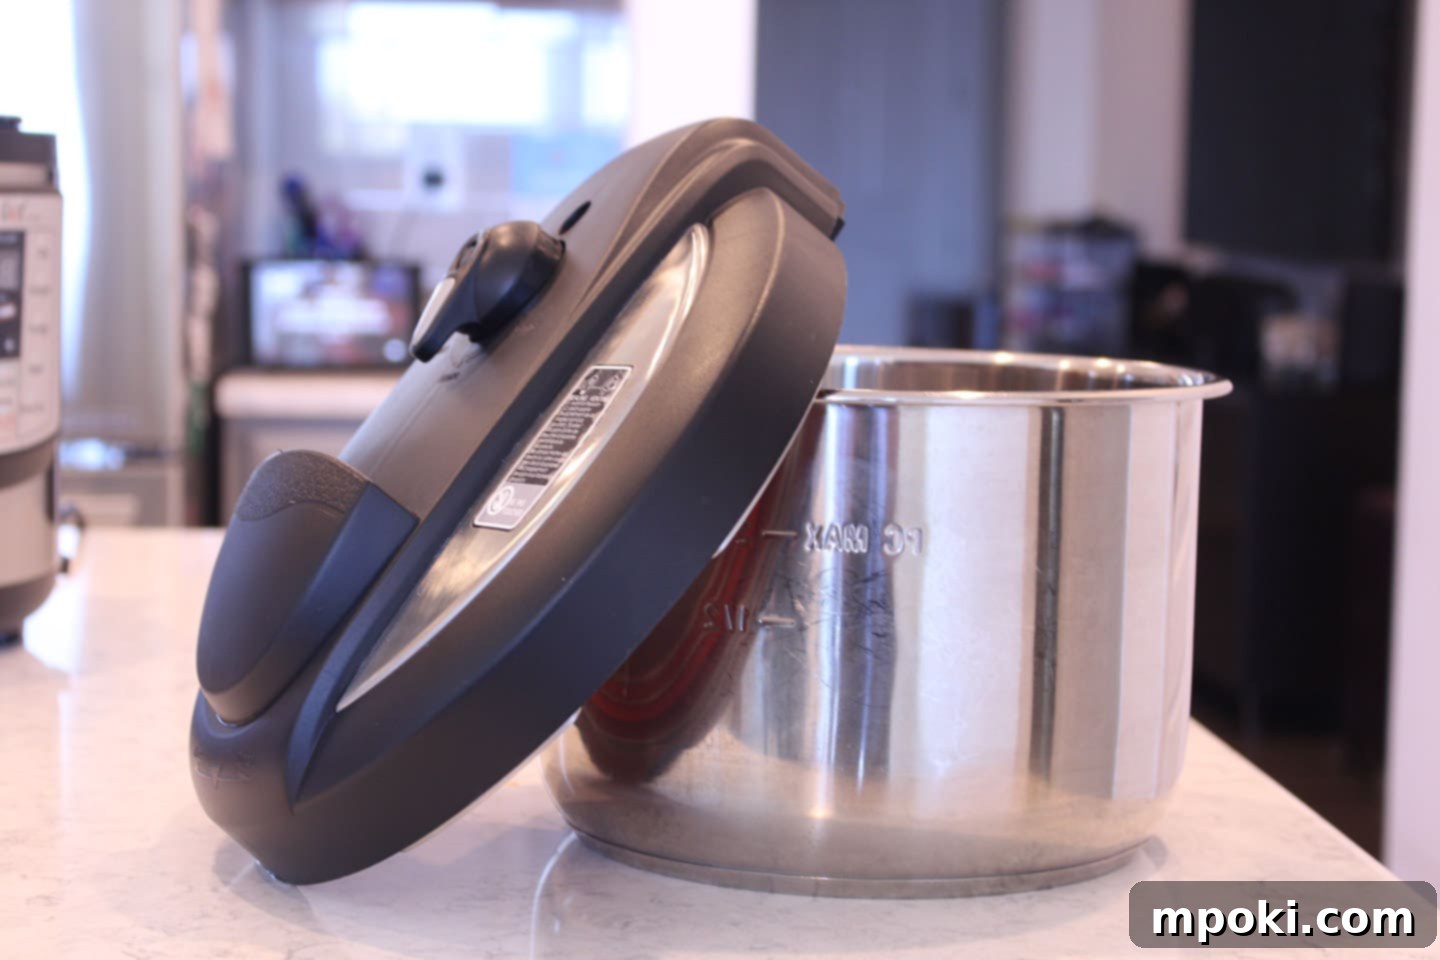
At its core, the Instant Pot is cleverly designed with three primary components that work in harmony to create its magic: the main unit, the stainless-steel inner pot, and the lid. Each part plays a crucial role in the pressure cooking process, ensuring safety, efficiency, and delicious results. Familiarizing yourself with these essential components is the first step towards becoming an Instant Pot pro.
The Main Unit: The Brains and Brawn of Your Kitchen Helper
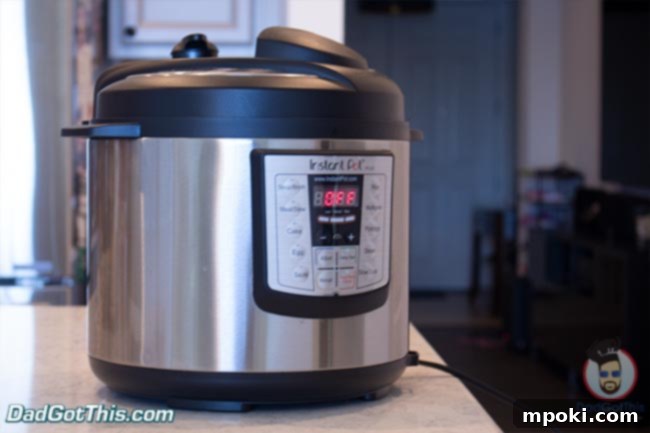
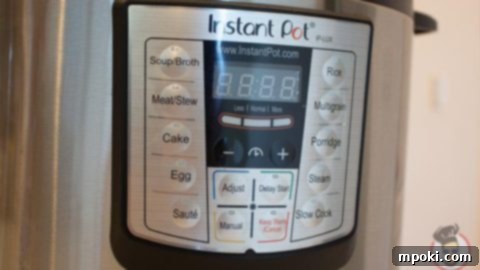
The main unit is the outer shell of your Instant Pot, the impressive appliance you’ll proudly (or perhaps strategically) find space for on your kitchen counter. This robust housing is where all the complex technology resides. It contains the powerful heating element that brings your food to temperature, the intricate sensors that monitor pressure and temperature for precise cooking, and the control panel with all the buttons and digital display you’ll interact with. It’s also where the inner pot is cradled and the lid securely attaches, forming a sealed environment for pressure cooking. Familiarizing yourself with the control panel is key, as it’s your command center for selecting cooking programs, adjusting time, and monitoring progress. The main unit is designed with multiple safety mechanisms to ensure a worry-free cooking experience, making it much safer than traditional stovetop pressure cookers.
The Inner Pot: Where Culinary Transformations Happen
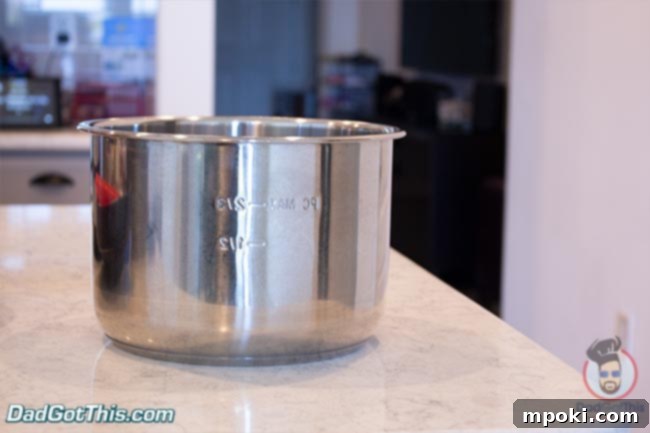
Nestled perfectly within the main unit is the stainless-steel inner pot. This is the heart of your Instant Pot, the vessel where all your ingredients come together to cook. Made from durable, food-grade stainless steel, this pot offers excellent heat distribution for even cooking and is naturally non-reactive, ensuring your food’s flavor isn’t altered. Its robust construction makes it perfect for a wide range of cooking tasks, from searing and sautéing to slow cooking and, of course, pressure cooking. The stainless steel material is also known for its longevity and resistance to corrosion. One of its best features for busy home cooks is its ease of cleaning – it’s typically dishwasher safe, though a quick hand wash often suffices, especially if you know a few Instant Pot cleaning hacks to tackle any stubborn food residue or prevent mineral buildup.
The Lid: The Seal That Makes Pressure Cooking Possible
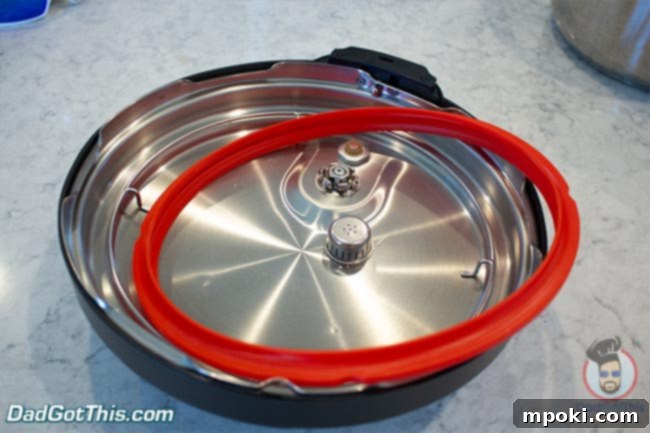
The lid is perhaps the most crucial component for pressure cooking, as it’s responsible for creating and maintaining the airtight seal necessary for building pressure. It securely attaches to the main unit, locking in heat and steam. The lid isn’t a single, solid piece; it comprises several vital parts: the silicone sealing ring, the steam release valve (often referred to as the “toggle” or “steam release handle”), and the float valve. The silicone sealing ring is particularly important, as it forms the seal between the lid and the inner pot. It must be properly installed for the Instant Pot to pressurize. Over time, these rings can absorb strong food odors (think garlic or curry), which is why Dad often recommends having multiple rings for different types of food (e.g., one for savory, one for sweet, and one for everyday use). The steam release valve allows you to control the release of pressure, while the float valve is a safety indicator that rises when the pot is pressurized and drops when it’s safe to open. The entire lid, including its removable parts, is generally dishwasher safe, simplifying cleanup and ensuring hygiene.
Your First Instant Pot Experience: Simple Steps to Get Started
Ready to put your Instant Pot to work? Here’s a simplified, step-by-step guide to cooking your first meal. These fundamental actions apply to nearly every pressure cooking recipe, making them the core skills you need to master. By following these steps, you’ll gain confidence and be well on your way to enjoying delicious, pressure-cooked meals.
Step 1: Prepare Your Instant Pot for Cooking
Before you begin, ensure your Instant Pot is clean and ready. The silicone sealing ring should be securely seated inside the lid’s rim, ensuring it forms a snug fit. Also, confirm the vent cover (if your model has one) is properly attached. This is crucial for maintaining the pressure seal. Once these checks are complete, you can plug in the main unit. Your Instant Pot will typically display “OFF” or a similar standby indicator, signifying it’s powered on and ready for your commands.

Step 2: Add Your Ingredients to the Inner Pot
Now it’s time for the food! Carefully place all your ingredients, including any necessary liquids, into the stainless-steel inner pot. Remember, liquid is absolutely essential for pressure cooking, as it creates the steam needed to build pressure. Without sufficient liquid, your Instant Pot won’t be able to come to pressure, and you might even get a “Burn” error. Most recipes call for at least 1 cup of thin liquid (like water, broth, or juice). You can add ingredients with the inner pot either removed from the main unit or already inserted – choose whichever is most comfortable for you. If you’re dealing with a large volume of liquid or simply want to avoid spills, removing the inner pot for filling is a safer bet. You definitely want to prevent any liquid or food from getting into the main unit’s housing, as this can damage the heating element.

Step 3: Securely Attach and Lock the Lid
With your ingredients in, it’s time to seal the pot. Angle the lid slightly to the left, aligning the arrow or notch on the lid with the corresponding opening on the Instant Pot’s main unit. Gently lower the lid into place. It’s designed to fit only one way. Once the lid is seated, turn it clockwise until you hear a pleasant jingle – typically a “Do, Do, Da, Da” sound – indicating it’s fully locked. This audible cue confirms a secure closure. Next, ensure the steam release handle (toggle) on top of the lid is set to the “Sealing” position. This is crucial for the pot to build and maintain pressure. For pressure cooking, a secure seal is paramount for safety and effective cooking.

Step 4: Select Your Cooking Function and Time
Now for the fun part: telling your Instant Pot what to do! The control panel features various buttons for different functions (e.g., Rice, Soup, Meat/Stew, Sauté). For most basic pressure cooking, Dad often relies on the “Manual” or “Pressure Cook” button, as it offers the most versatility. Press this button, and the screen will flash a number, which represents the default cooking time in minutes. Use the “+” and “–” buttons to adjust this time according to your recipe’s specifications. You can also adjust the pressure level (High or Low) on some models. Once you’ve set your desired time, simply wait a few seconds. The unit will beep to confirm your selection and display “On” (or similar indicator like “Heat”) on the screen, signaling that it’s beginning to preheat and build pressure. The time displayed will count down once the desired pressure is reached.

Step 5: Safely Release the Pressure
Once the cooking cycle is complete, your Instant Pot will beep again, and the screen will typically display “L0” (or “End” on some models), indicating that the pressure cooking phase is done. Now, you need to release the built-up pressure inside before opening the lid. You have two main methods:
- Fast Release (QR – Quick Release): This involves immediately turning the steam release toggle from “Sealing” to “Venting” as soon as the cooking cycle finishes. A strong jet of steam will shoot out from the valve, so always be cautious and keep your hands and face clear. Use a long-handled spoon or oven mitt to turn the toggle to avoid direct contact with the hot steam. Fast release is often used for foods that you don’t want to overcook, like vegetables, seafood, or delicate desserts, where stopping the cooking process quickly is beneficial.
- Natural Release (NPR – Natural Pressure Release): For this method, you simply allow the Instant Pot to cool down naturally. The pressure will gradually dissipate on its own over time, typically 10-20 minutes or longer, depending on the volume of food. The float valve will eventually drop on its own. This method is ideal for foamy foods like soups or grains, as well as large cuts of meat, as it helps prevent tough textures and keeps food tender by allowing it to rest in the residual heat. Many recipes specify a “Natural Release” for a certain amount of time before a “Quick Release” for optimal results.
Regardless of the method, you’ll know all the pressure is released when the small silver float valve on the lid drops down completely. Only then is it safe to twist the lid counterclockwise and remove it.

Step 6: Serve and Enjoy Your Delicious Creation!
With the pressure safely released and the lid removed, your culinary masterpiece is ready! Carefully remove the inner pot (using oven mitts if it’s hot) and serve your freshly cooked meal. Prepare to be amazed by how quickly and effortlessly you created a flavorful dish. Don’t forget to clean your Instant Pot thoroughly after each use to keep it in top condition.

Quick Troubleshooting & Essential Maintenance
Even seasoned Instant Pot users encounter minor hiccups. Here are a few common issues and tips to keep your appliance running smoothly and extend its lifespan:
- “Burn” Message: This often means there isn’t enough thin liquid at the bottom of the pot, or food has stuck to the bottom. Always ensure you have at least 1 cup of thin liquid for pressure cooking. If sautéing before pressure cooking, deglaze the pot thoroughly with liquid to scrape up any stuck bits.
- Pot Not Coming to Pressure: This is usually due to an improper seal. Double-check if the lid is sealed correctly and if the steam release handle is set to “Sealing” (not “Venting”). Also, ensure the silicone sealing ring is properly installed, clean, and free from any food debris or damage. A damaged ring will prevent a proper seal.
- Cleaning: Always wash the inner pot and lid thoroughly after each use. Pay special attention to the silicone sealing ring, which can absorb strong odors. A good trick is to wash it with vinegar or soak it in baking soda and water to neutralize smells. Having a spare sealing ring dedicated to savory or sweet dishes can prevent flavor transfer and ensure you always have a fresh-smelling ring ready.
For more in-depth tips, advanced techniques, and common issues, check out Dad’s Top 5 Instant Pot Tips & Hacks.
Watch: How to Use Your Instant Pot (Video Guide)
Prefer visual instructions? Watch Dad walk you through these basic steps in this helpful video tutorial. Seeing the steps in action can make all the difference in understanding how to confidently use your Instant Pot:
https://youtu.be/IQgqBFGp6_8
 Tried this Tip? Mention @DadGotThis or tag #DadGotThis on social media! We love to see your culinary creations!
What to Cook Next? Delicious Instant Pot Recipes!
Now that you’re equipped with the fundamental knowledge of how to operate your Instant Pot, it’s time to put your newfound skills to the test! Here are a few beginner-friendly and incredibly flavorful recipes from Dad to get you started on your culinary journey. Each recipe is designed to be straightforward, making your first few Instant Pot experiences a resounding success.
Dad’s Instant Pot Sticky Korean Spare Ribs
These incredibly tender and flavorful Korean-inspired spare ribs are a perfect example of the Instant Pot’s speed and efficiency. Achieve fall-off-the-bone results in a fraction of the traditional cooking time, packed with an irresistible sticky glaze that will have everyone asking for more.
Get the Recipe: Instant Pot Spare Ribs
Dad’s Filipino Instant Pot Bulalo (Beef Shank Soup)
Experience the rich, comforting flavors of Filipino Bone Broth with this hearty Bulalo soup. Made with tender beef shanks and an abundance of fresh vegetables, this dish is not only deeply nourishing but also incredibly filling, a perfect family meal that tastes like it simmered all day.
Get the Recipe: Instant Pot Bulalo
Dad’s Instant Pot Spaghetti with Meatballs and Sausage
Who knew you could hack an “all-day sauce” in minutes? Dad has taken his Italian Nana’s traditional recipe and adapted it for the Instant Pot, delivering a rich, savory spaghetti sauce complete with tender meatballs and juicy sausage in a fraction of the usual cooking time. A true weeknight family favorite that tastes like Sunday dinner!
Get the Recipe: Instant Pot Spaghetti
Join Dad on YouTube for More Instant Pot Fun!
Love learning from Dad? Head over to his YouTube channel for more Instant Pot tutorials, delicious recipes, and kitchen hacks. Don’t forget to subscribe and hit the notification bell so you don’t miss out on any new content!
