Cast Iron Chicken Parmesan: The Ultimate Crispy, Cheesy, Family-Favorite Recipe

There’s an undeniable magic in teaching your children to cook their favorite meals from scratch. It’s more than just a culinary lesson; it’s an experience that weaves together tradition, laughter, and delicious memories. And when that meal is a classic like Cast Iron Chicken Parmesan, the experience becomes even more special. This isn’t just any Chicken Parmesan; it’s a dish elevated by the unique qualities of cast iron, crafted with a rich, generations-old family red sauce, and designed for maximum crispiness and flavor that will have everyone asking for seconds.
This page contains affiliate links. For more information, please see our Disclosures.
Making Memories (and Dinner) with Cast Iron Chicken Parmesan
Embarking on a cooking adventure with my daughter, armed with our trusty Victoria Cast Iron pans, was more than just preparing dinner. It was a mission to pass down a cherished family recipe, a blend of traditional techniques and hearty flavors that have stood the test of time. From the moment we rolled up our sleeves and stepped into the kitchen, it was clear this would be a delightful mix of culinary education, spontaneous giggles, and heartfelt connection. The result? A crispy, cheesy, and truly kid-approved Cast Iron Chicken Parmesan that tastes infinitely better than any takeout, and an unforgettable bonding experience.
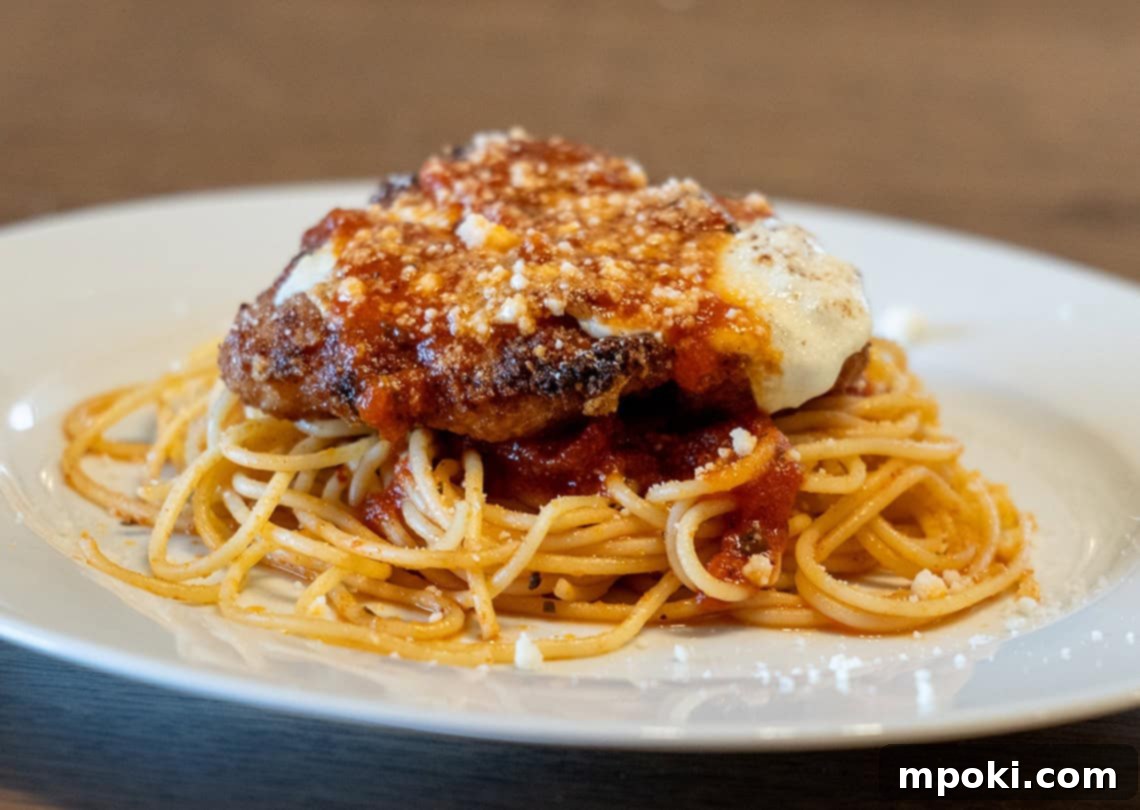
Our journey to the perfect Chicken Parmesan began with a commitment to real ingredients and time-honored traditions. The homemade red sauce, a recipe straight from my mom and nana’s kitchen, simmered slowly in our cast iron Dutch oven, developing a depth of flavor that only patience and quality ingredients can achieve. The chicken breasts were carefully prepped – brined for unparalleled juiciness, pounded thin for even cooking, and coated in a breading that promised a golden, crunchy exterior. Each step was a hands-on lesson, filled with purpose and fun. What emerged from the kitchen was pure comfort food perfection: chicken cutlets with wonderfully crisp edges, a luscious, bubbly cheese topping, and an explosion of rich, savory flavor in every bite.

Cast Iron Chicken Parmesan
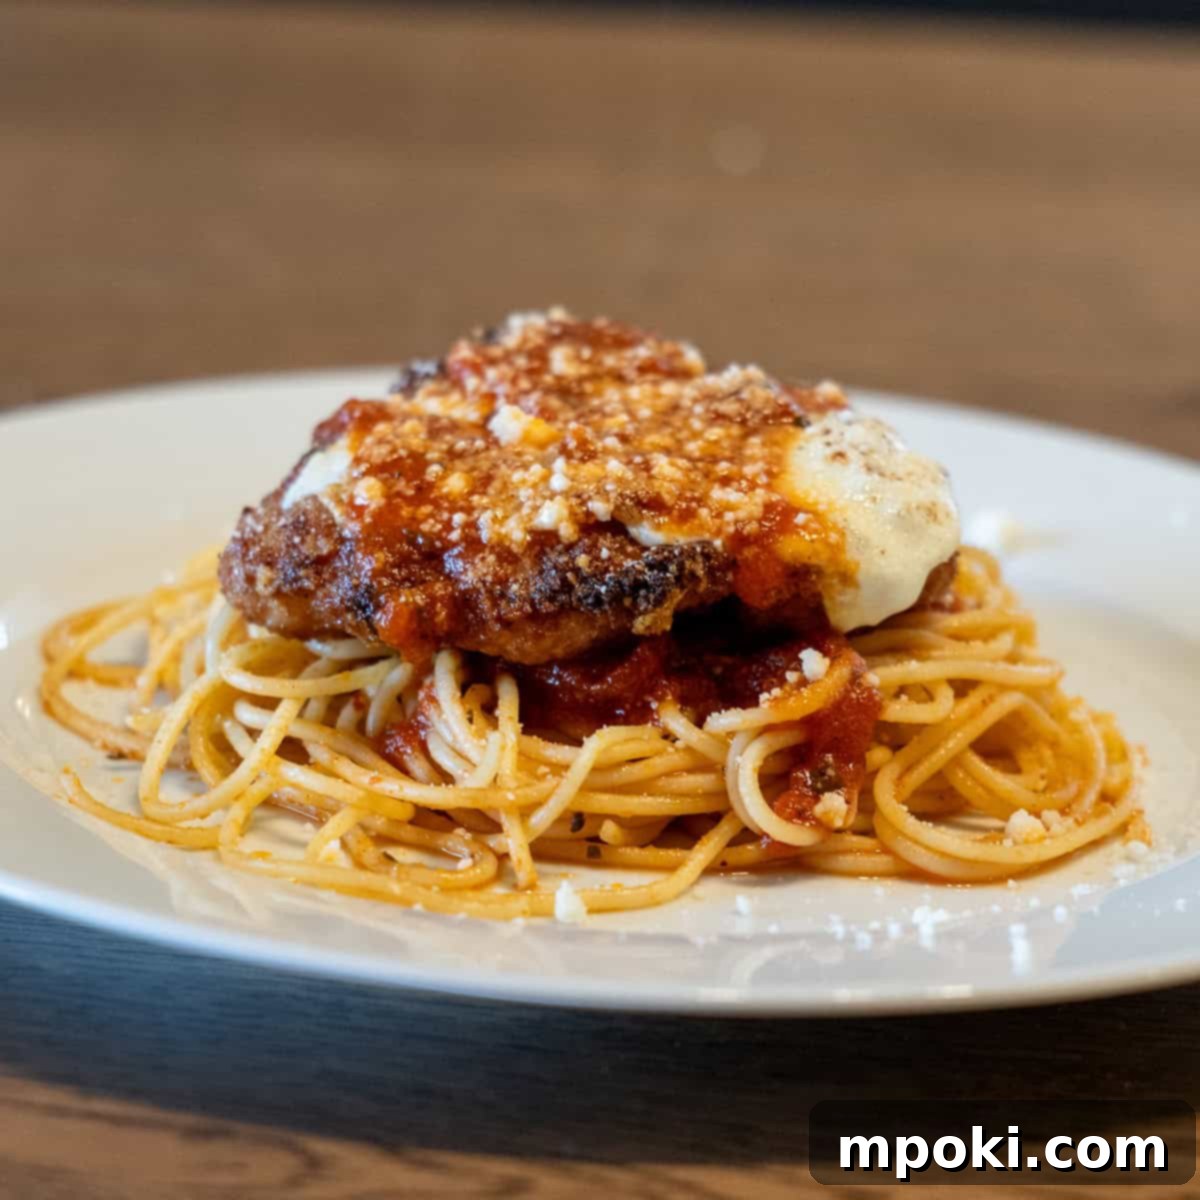
Our Cast Iron Chicken Parmesan is juicy, crispy, and packed with flavor. With a homemade red sauce and broiled cheese topping, it’s a family favorite that beats takeout every time.
Pin
Course: Main Course
Cuisine: Italian
Prep Time: 40 minutes
Cook Time: 1 hour 15 minutes
Brine Time: 30 minutes
Total Time: 2 hours 25 minutes
Calories: 4075 kcal
Author: Dad
Equipment
- Cast Iron Dutch oven or heavy-bottom pan
- Medium and large bowls
- Whisk
- Sheet pan + wire rack
- Large cast iron skillet for frying
- Tongs
- Zipper storage bag
- Broiler-safe oven
Ingredients
Chicken Parm
- 1 lb Spaghetti (Cook to Package Directions)
- 3 chicken breasts, split and pounded thin
- ¼ cup flour
- 3 eggs
- 3 tbsp milk
- ½ cup Pecorino Romano cheese
- ½ cup Italian breadcrumbs
- Fresh mozzarella, sliced
- Spaghetti, cooked al dente per package directions (note: repeated from above, clarified)
- Olive oil for frying
Chicken Brine
- ½ cup sea salt
- ½ cup white sugar
- 4 cups water
Mom’s Red Sauce
- 1 can tomato paste
- 1 can whole tomatoes (San Marzano style recommended)
- 14 oz Water
- 4 garlic cloves, minced
- 1 tsp granulated garlic
- 1 tsp granulated onion
- 1 tsp oregano
- 3 tbsp olive oil
- Salt & pepper to taste
Instructions
Make Mom’s Red Sauce
- In a Dutch oven or heavy-bottom pot, heat 3 tablespoons of olive oil over medium heat.
- Add minced garlic, granulated garlic, and granulated onion to the pot. Sauté until the onions become translucent and fragrant, typically 3-5 minutes. Be careful not to burn the garlic.
- Stir in the tomato paste. Cook, stirring frequently, until the tomato paste darkens significantly, caramelizing and developing a deep, rich color. This step is crucial for profound flavor.
- Crush the whole tomatoes by hand directly into the pot and mix well with the caramelized paste and aromatics.
- Add oregano, salt, and black pepper to taste. Start with recommended amounts and adjust later.
- Reduce the heat to low, cover, and let the sauce simmer gently for at least 1 hour, stirring every 10-15 minutes to prevent sticking and ensure even cooking. This slow simmer allows the flavors to meld beautifully.
- After simmering, taste the sauce and adjust seasonings (salt, pepper, or a pinch of sugar if too acidic) as needed.
Brine the Chicken
- While the red sauce is about 30 minutes into its simmering process, prepare the chicken brine. In a large bowl or pitcher, mix the sea salt, white sugar, and 4 cups of water until the salt and sugar are completely dissolved.
- Place the pounded chicken breasts into a large, resealable zipper storage bag. Pour the brine over the chicken, ensuring it is fully submerged.
- Refrigerate the chicken in the brine for 30 minutes. Do not exceed this time, as over-brining can make the chicken too salty.
- After brining, remove the chicken from the bag and pat it extremely dry with paper towels. This step is critical for achieving a crispy crust during frying.
Bread the Chicken
- Set up a three-station breading assembly line:
- Station 1: A shallow dish with flour.
- Station 2: A bowl with the beaten eggs and milk, whisked together.
- Station 3: A shallow dish with the Pecorino Romano cheese and Italian breadcrumbs mixed thoroughly.
- Dredge each chicken piece individually:
- First, coat completely in flour, shaking off any excess.
- Next, dip into the egg and milk mixture, allowing any extra to drip off.
- Finally, generously coat in the cheese/breadcrumb mixture, pressing gently to ensure an even, firm layer.
- Place the breaded chicken cutlets on a wire rack set over a baking sheet. This helps to keep them from getting soggy while you finish breading all the pieces.
Fry the Cutlets
- In a large, heavy-bottom Victoria Cast Iron skillet (or other cast iron frying pan), add enough olive oil to generously coat the bottom, about ¼ to ½ inch deep. Heat the oil over medium-high heat until shimmering, but not smoking. A good test is to drop a few breadcrumbs in; they should sizzle gently.
- Once the oil is hot, carefully place chicken cutlets into the skillet in batches. Avoid overcrowding the pan, as this lowers the oil temperature and can lead to soggy chicken.
- Fry each chicken cutlet for 1-2 minutes per side, or until beautifully golden brown and crispy. The internal temperature should reach 165°F (74°C).
- Using tongs, transfer the fried cutlets back to the wire rack set over a sheet pan. This setup is essential for maintaining their crispiness while you prepare the remaining cutlets.
Add Cheese & Broil
- Preheat your oven’s broiler. Position an oven rack about 6-8 inches from the broiler element.
- Top each crispy fried chicken cutlet with several slices of fresh mozzarella cheese.
- Carefully place the sheet pan with the cutlets under the preheated broiler. Broil for 2-4 minutes, keeping a close eye on them, until the cheese is completely melted, bubbly, and has delightful golden-brown spots.
Plate & Serve
- Generously plate your perfectly cooked spaghetti.
- Spoon a healthy portion of Mom’s Red Sauce over the pasta.
- Carefully place a crispy, cheesy chicken cutlet on top of the sauced spaghetti.
- Add another spoonful of red sauce over the chicken, or serve it on the side for those who prefer maximum crispiness.
- Finish with a generous sprinkle of extra grated Pecorino Romano or Parmesan cheese.
- Serve immediately! Chicken Parmesan is best enjoyed fresh to preserve its wonderful textures.
Nutrition Information (Estimated per serving)
- Calories: 4075 kcal
- Carbohydrates: 534g
- Protein: 254g
- Fat: 99g
- Saturated Fat: 25g
- Polyunsaturated Fat: 14g
- Monounsaturated Fat: 47g
- Trans Fat: 0.1g
- Cholesterol: 983mg
- Sodium: 59670mg
- Potassium: 4900mg
- Fiber: 24g
- Sugar: 129g
- Vitamin A: 1828IU
- Vitamin C: 52mg
- Calcium: 1172mg
- Iron: 21mg

Tried this recipe?
Mention @DadGotThis or tag #DadGotThis!
Why Cast Iron Chicken Parmesan Elevates the Classic
There’s a reason our Cast Iron Chicken Parmesan stands out from the crowd. It begins with the fundamental components, each enhanced by thoughtful preparation and the unparalleled advantages of cast iron cookware. This isn’t just about combining ingredients; it’s about building layers of flavor and perfecting texture, transforming a beloved classic into something extraordinary.
The Secret is in Mom’s Red Sauce: A Flavor Bomb
Let’s talk about the red sauce. In many Chicken Parmesan recipes, the sauce plays a supporting role, but here, it’s a co-star—a rich, vibrant foundation that ties the entire dish together. Our homemade sauce is built on a robust base of minced garlic, granulated garlic and onion, and, crucially, tomato paste. The magic happens when that tomato paste is caramelized in the Victoria Cast Iron Dutch oven, stirring it until it deepens in color, almost to the point of being burnt, but never quite there. This age-old technique, passed down through generations, unlocks an incredible depth of umami and sweetness you simply cannot replicate with pre-made sauces. Once the San Marzano-style whole tomatoes are crushed and added, along with a generous dash of oregano (yes, oregano is non-negotiable in our family recipe!), the sauce simmers down slowly, concentrating its flavors into a truly special elixir. The even heat distribution of cast iron ensures a gentle, consistent simmer, preventing hot spots and allowing the sauce to develop its full, complex character without scorching.
Perfectly Tender & Crispy Cutlets: Brine and Pound Your Way to Success
Many home cooks skip the brining step when preparing chicken for Parmesan, but this is where our recipe gains a significant edge. We create a simple brine by mixing four cups of water with half a cup each of salt and sugar. Just 30 minutes in this solution makes an astonishing difference. The chicken breasts emerge noticeably more flavorful, incredibly juicy, and perfectly seasoned without being overly salty, thanks to the balanced brine and precise timing. This little trick is one of the unsung heroes of our Cast Iron Chicken Parmesan, ensuring moist and tender chicken every time.
Following the brine, it’s time for the mallet! Pounding the chicken breasts thin serves multiple crucial purposes. Firstly, it ensures even cooking, meaning no dry edges or undercooked centers. Secondly, it creates thinner cutlets, which translates to a much crispier result when fried. My daughter enthusiastically embraced the “bag and bash” technique, turning the prep work into a joyful and memorable activity. This hands-on involvement not only made the cooking process more engaging but also deepened her connection to the meal. It’s these small, intentional steps that elevate a good recipe to a great one, especially when cooked with love and a bit of family fun.
Frying Perfection in the Victoria Cast Iron Skillet
Now, let’s talk about the star of the show for achieving that irresistible crunch: the frying process in our Victoria Cast Iron skillet. While olive oil isn’t a typical choice for deep frying, it works exceptionally well for our shallow frying technique, lending a subtle richness to the crust. The goal is to achieve perfectly golden, exquisitely crispy cutlets without overheating the oil, and the cast iron skillet handles this beautifully. Cast iron’s superior heat retention and even heat distribution ensure that each cutlet fries consistently, developing a uniform golden-brown crust.
Thanks to the thinness achieved by pounding, the chicken cutlets require minimal time in the hot oil, cooking quickly to perfection while staying juicy inside. A significant advantage of the Victoria Cast Iron skillet is its thoughtfully designed handle, which often features an extended length or ergonomic shape, allowing me to comfortably hold the pan during cooking without the fear of burning my hand. This seemingly small detail is genuinely game-changing for safe and efficient frying. The unique surface of the cast iron also contributes to that signature crispy crust—not greasy, not soggy, but the kind of golden-brown perfection you dream about in a top-tier Cast Iron Chicken Parmesan.
The Broiler Finish: Crispy Cheese, Not Soggy Sauce
Here’s where our Cast Iron Chicken Parmesan truly diverges from many conventional recipes and why it remains a favorite. While most chicken parm calls for a full layering of sauce, then cheese, then more sauce, we intentionally keep the main portion of the sauce off the top of the cutlet. This crucial decision is made to preserve the incredible crispiness of those beautifully fried chicken cutlets. Instead, we simply top each cutlet with generous slices of fresh mozzarella cheese and slide the entire skillet (or the wire rack with cutlets) under a hot broiler.
Under the intense heat of the broiler, the cheese melts into a glorious, gooey blanket, bubbling enthusiastically and forming delightful golden-brown spots on top. The result is a dish that delivers on every textural promise: the chicken cutlet retains its satisfying crunch, the mozzarella transforms into a luscious, stretchy, slightly browned topping, and the rich red sauce is served alongside, allowing its deep flavors to shine without compromising the chicken’s crispness. This method ensures that every element of the Cast Iron Chicken Parmesan plays its role perfectly, creating a harmonious and utterly delicious experience where no component overshadows another.
A Family Favorite, Made Better with Cast Iron
Cooking this recipe with my daughter transcended the simple act of preparing dinner; it became a cherished moment of connection and shared learning. From the initial lesson in safely slicing chicken breasts to the joy of little fingers (and sometimes whole hands!) dipping into flour, eggs, and breadcrumbs, it was a full-on kitchen bonding session. And honestly, the meal we created together turned out to be superior to most restaurant versions we’ve ever tasted. The flavors were incredibly deep and well-developed, the textures were spot-on, and the sheer joy of crafting it together added an invaluable dimension to the dining experience.
Throughout every stage of this culinary journey, utilizing our Victoria Cast Iron cookware made a profound difference. From slowly building the complex flavors of Mom’s Red Sauce in the Dutch oven to achieving perfectly crispy chicken cutlets in the skillet, and finally, melting the cheese to bubbly perfection under the broiler, these pans performed flawlessly. There was no fuss, no uneven hotspots, and certainly no drama. For a dish as classic and comforting as Cast Iron Chicken Parmesan, choosing kitchen tools that embody timeless reliability and exceptional performance, like Victoria Cast Iron, truly takes the experience to the next level. It’s a testament to the fact that some traditions are best honored with the right equipment.
Ingredient and Equipment Links:
Explore Victoria Signature Series Cast Iron Pans:
https://victoriasignature.com
Did you know Dad is on YouTube?
Go check out Dad’s YouTube channel for all kinds of great cooking videos and food-related content. Discover more recipes, cooking tips, and family kitchen adventures!
