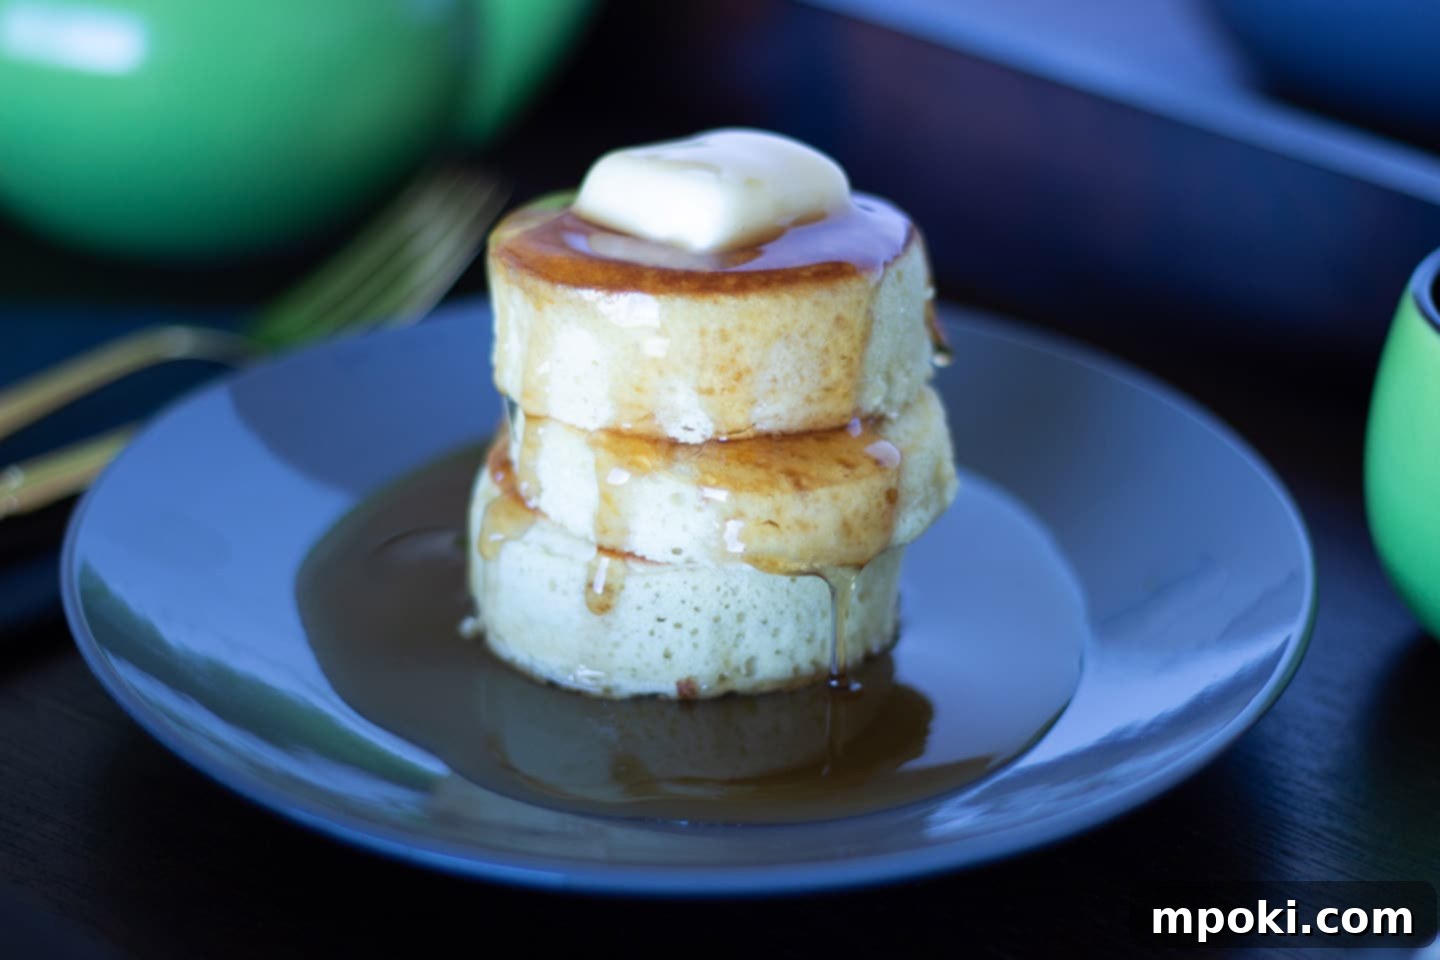
Unlock the Secret to Perfectly Fluffy Japanese Pancakes: A Step-by-Step Guide
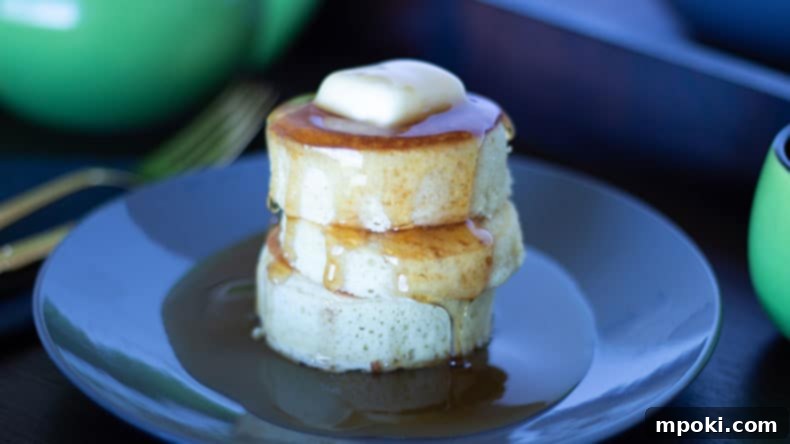
If you’ve ever dreamt of biting into a cloud-like breakfast, then you’re in the right place! Japanese pancakes, also known as soufflé pancakes, have taken the culinary world by storm with their unique, incredibly fluffy, and delightfully jiggly texture. They are a significant departure from the denser, more traditional “American Style” pancakes many of us grew up with. This comprehensive guide will walk you through the process of creating these culinary marvels right in your own kitchen, turning a seemingly complex recipe into an accessible and enjoyable cooking experience.
The magic behind these ethereal pancakes lies in one key ingredient: egg whites. Whipped with sugar to form a stable meringue, these egg whites are carefully folded into the batter, injecting it with an incredible amount of air. This technique transforms a simple pancake into a delicate hybrid, somewhere between a classic pancake and a light, airy soufflé. For anyone accustomed to making pancakes from scratch, this recipe won’t feel like a huge leap; it simply introduces a few nuanced steps that yield truly spectacular results.
PIN THIS RECIPE TO PINTEREST
Save this delightful Japanese Pancake recipe to your Pinterest board for future breakfast inspiration!
Please Note: This Page May Contain Affiliate Links. For More Information, See Our Disclosures Here.
Mastering the Art of Japanese Soufflé Pancakes
Embarking on the journey to create Japanese soufflé pancakes is a rewarding experience. While they might appear intimidating with their impressive height and delicate texture, the process is straightforward with the right techniques. From carefully separating eggs to gently folding in the meringue, each step plays a crucial role in achieving that signature fluffiness. Follow these detailed instructions, and you’ll be serving up café-worthy pancakes in no time.
Step 1: Precision Egg Separation
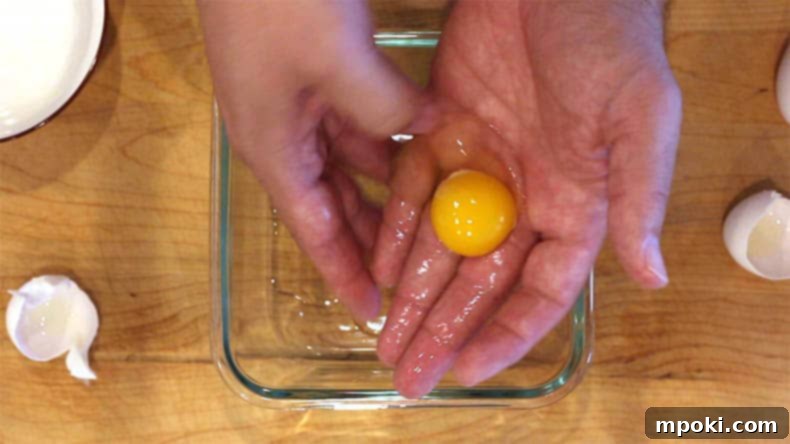
The foundation of a perfect soufflé pancake begins with the eggs. You’ll need to meticulously separate the egg whites from the yolks. A common and effective method is the “through the fingers” technique: gently crack an egg into the palm of your hand, then slightly open your fingers, allowing the egg white to stream through into a bowl below while retaining the yolk in your palm. This method minimizes the risk of breaking the yolk and introducing any fat into the whites, which is crucial for successful meringue formation. Once separated, place the egg whites in a clean, medium-sized mixing bowl and pop them into the freezer for about 10-15 minutes. This chilling step isn’t strictly mandatory, but it significantly aids in achieving a stiffer, more stable meringue when whipping, giving your pancakes an extra lift.
Step 2: The Importance of Sifting Flour

Achieving that coveted smooth, airy texture in your Japanese pancakes also relies heavily on properly prepared dry ingredients. Sifting the flour is a non-negotiable step that should never be skipped. This process aerates the flour, breaking up any clumps and ensuring it mixes seamlessly into the wet ingredients without forming lumps. It also makes the flour lighter, contributing to the overall delicate structure of the pancake. To do this, simply pass your all-purpose flour through a medium to fine-mesh strainer directly over a large mixing bowl. After sifting, add the baking powder and baking soda to the flour and whisk them together thoroughly. This ensures these leavening agents are evenly distributed, ready to work their magic and provide additional lift during cooking.
Step 3: Whip Those Egg Whites to Perfection

Now, for the exhilarating part: transforming those humble egg whites into a magnificent meringue! While it’s technically possible to do this by hand, an electric hand mixer will save your wrists and guarantee better results. Retrieve your chilled egg whites from the freezer and pour them into a clean, dry mixing bowl. Begin whipping on high speed, adding about one-quarter of the sugar gradually. As the egg whites start to thicken and become opaque, slowly incorporate the remaining sugar, continuing to whip until stiff, glossy peaks form. You’re aiming for a consistency that resembles a “fluffy cloud” – when you lift the beaters, the meringue should hold its shape firmly without collapsing. This perfectly whipped meringue is the secret to the pancakes’ signature height and jiggly texture.
Step 4: Crafting the Silky Pancake Batter

With your dry ingredients sifted and your meringue whipped, it’s time to assemble the main batter. To the bowl containing your sifted flour, baking powder, and baking soda, add the vanilla extract, a touch of lemon juice, and the reserved egg yolks. The lemon juice is a subtle but important addition; its acidity helps to tenderize the flour and can also contribute to the stability of the meringue. Pour in about a quarter cup of milk (2% or whole milk works best for richness). Using a whisk, gently mix all these wet and dry ingredients together until you achieve a smooth, homogenous batter. Avoid overmixing, which can develop the gluten in the flour and result in tougher pancakes. The ideal consistency is slightly on the liquid side, similar to a traditional pancake batter but perhaps a little thinner. If your batter seems too thick, add a tiny splash more milk until it reaches the desired smooth, flowing consistency.
Step 5: The Gentle Art of Folding
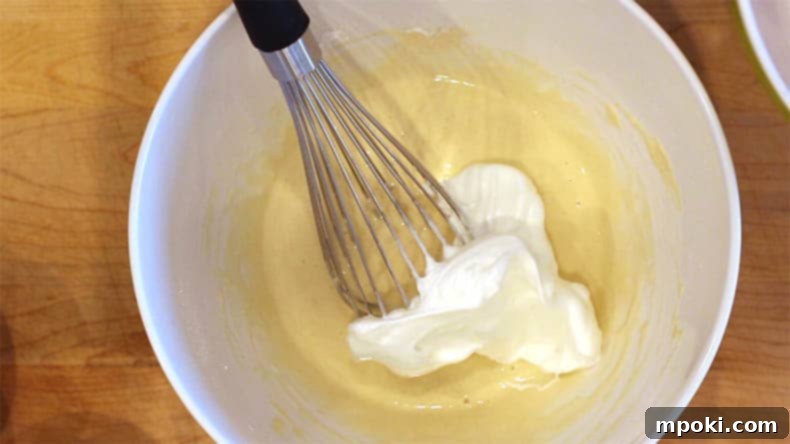
This step is where the magic truly comes together, but it requires a delicate touch. The goal is to incorporate the airy meringue into the pancake batter without deflating all the precious air bubbles you worked so hard to create. Begin by adding about one-third of the meringue to your main batter. Use a whisk or a rubber spatula to gently fold it in. The technique involves cutting down through the center of the batter, scraping along the bottom of the bowl, and folding it back over. Repeat this process, gradually adding the remaining meringue in two more batches, until it’s just incorporated. Stop mixing as soon as no streaks of white remain. Overmixing here will result in flat pancakes. Once beautifully combined, set the batter aside for approximately 10 minutes. This resting period allows the baking powder and baking soda to fully activate and react with the liquids, enhancing the batter’s leavening power and ensuring an even spongier, fluffier pancake when cooked.
Step 6: Temperature Control is Key
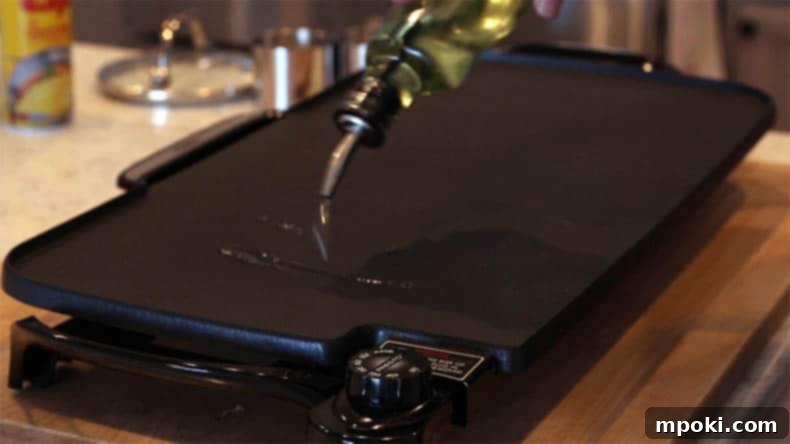
Unlike traditional, thin pancakes that benefit from higher heat for a quick golden exterior, Japanese soufflé pancakes require a lower, more controlled temperature. Their impressive thickness means they need more time to cook through to the center without burning the outside. If cooked at too high a temperature, the bottoms will scorch long before the interior is set, leaving you with raw, sunken pancakes. For an electric griddle, a temperature of around 300 degrees Fahrenheit (150 degrees Celsius) is usually ideal. If you’re using a nonstick pan on a stovetop, opt for a medium-low heat setting, ensuring it’s not too aggressive. Preheat your cooking surface thoroughly and add a tablespoon of vegetable oil, spreading it evenly to prevent sticking and aid in browning.
Step 7: Shaping Perfection with Food Rings
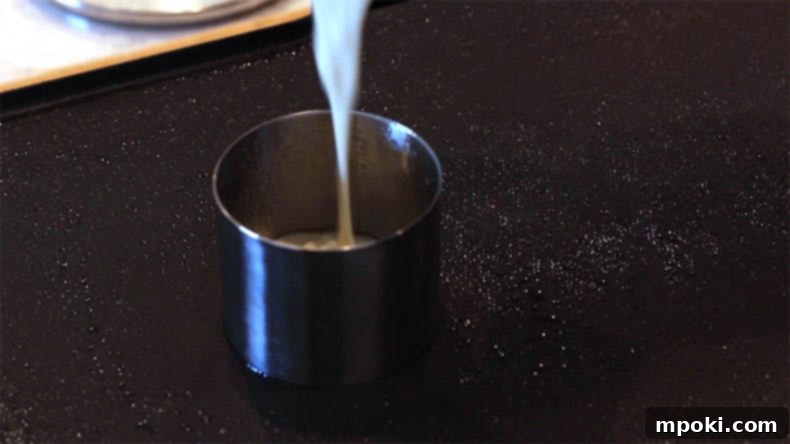
For those picture-perfect, Instagram-worthy Japanese pancakes, a set of stainless steel food rings is an invaluable tool. These rings, readily available on Amazon, are versatile kitchen aids useful for everything from shaping eggs to making crab cakes. For pancakes, place the food rings (a size of 2 inches in diameter and 2.75 inches in height works well) onto your preheated cooking surface. Lightly spray the inside of each ring with cooking spray to ensure the pancakes release effortlessly. Carefully spoon your delicate batter into each ring, filling them to your desired thickness. For thinner pancakes (about ¼ inch thick), cook for approximately 2 minutes per side. For thicker, truly soufflé-like pancakes (around ½ inch thick), allow them to cook for 5 minutes on the first side. After the initial cooking time, use tongs (the rings will be very hot!) to carefully remove the rings, then gently flip the pancakes with a spatula. Cook for an additional 2 minutes for thinner pancakes, or 2.5 minutes for thicker ones, until golden brown and cooked through. If you prefer to skip the rings, you can still achieve delicious results by cooking the pancakes free-form, though they won’t have the same uniform, towering shape.
Recipe for Japanese Soufflé Pancakes
This easy-to-follow recipe will help you create delightful Japanese soufflé pancakes. Enjoy fluffy, spongy, and incredibly delicious pancakes that are not much harder to make than your regular breakfast favorites.
Rated 5 out of 5 stars from 1 vote.
Pin Recipe
Course: Breakfast
Cuisine: American, Japanese
Keyword: Japanese pancakes, jiggly pancakes, soufflé pancakes
Prep Time: 15 minutes
Cook Time: 10 minutes
Total Time: 25 minutes
Servings: 6
Calories: 213.81 kcal
Author: Dad
Equipment Needed:
- Food Rings (optional, for shaping)
- Electric Griddle or non-stick pan
- Electric Mixer
- Spatula
- 2 Mixing Bowls
- Fine-mesh Sifter
- Whisk
- Tongs (for handling hot rings)
Ingredients:
- ¾ cup All-Purpose Flour
- 1 tablespoon All-Purpose Flour (for dusting/additional if needed)
- ½ teaspoon Baking Powder
- ¼ teaspoon Baking Soda
- ¾ cup Granulated Sugar
- 2 Large Eggs (separated)
- 1 teaspoon Vanilla Extract
- ¼ teaspoon Lemon Juice
- ¼ Cup Milk (2% or Whole recommended)
- Cooking Spray
- 1 tablespoon Vegetable Oil
Instructions:
- Carefully separate the egg yolks and egg whites into two distinct, clean bowls. Place the egg whites in the freezer for 10-15 minutes while you prepare other ingredients.
- Sift the ¾ cup of all-purpose flour over a large mixing bowl to remove clumps and aerate it.
- Add the baking powder and baking soda to the sifted flour, then whisk thoroughly to ensure even distribution.
- Remove the egg whites from the freezer and place them in a separate large mixing bowl. Add about ¼ of the sugar and begin whipping on high speed with an electric mixer. Gradually add the remaining sugar, continuing to whip until stiff, glossy peaks form (this usually takes 2-3 minutes). You’ve now created your meringue!
- In the bowl with the dry ingredients, add the vanilla extract, lemon juice, egg yolks, and ¼ cup milk. Whisk until the batter is smooth and free of lumps. If the batter appears too thick, add a tiny bit more milk until it resembles a slightly liquid cake batter.
- Gently incorporate the meringue into the pancake batter. Add it in thirds, folding lightly with a whisk or rubber spatula until just combined. Be careful not to deflate the air.
- Allow the batter to rest for at least 10 minutes. This critical step lets the leavening agents fully activate, resulting in an even spongier pancake.
- Preheat your electric griddle to 300°F (150°C) or a non-stick pan over medium-low heat.
- Lightly coat the cooking surface with 1 tablespoon of vegetable oil. Place 2-inch diameter food rings (if using) on the griddle.
- Spray the inside of each food ring generously with cooking spray. Pour your prepared batter into the rings, filling them to your desired thickness (e.g., ¼ inch or ½ inch).
- For ¼ inch thick pancakes, cook for approximately 2 minutes per side. For thicker, ½ inch pancakes, cook the first side for about 5 minutes.
- Carefully remove the hot food rings using tongs. Gently flip the pancakes. Cook for an additional 2 minutes for ¼ inch pancakes, or 2.5 minutes for ½ inch pancakes, until golden brown and cooked through.
- For the ultimate experience, serve your Japanese soufflé pancakes immediately with your favorite toppings!
Video Guide:
Nutrition Information (per serving):
- Calories: 213.81 kcal
- Carbohydrates: 38.75 g
- Protein: 4.43 g
- Fat: 4.63 g
- Saturated Fat: 2.71 g
- Cholesterol: 71.33 mg
- Sodium: 77.76 mg
- Potassium: 89.89 mg
- Fiber: 0.42 g
- Sugar: 25.67 g
- Vitamin A: 118.53 IU
- Calcium: 38.85 mg
- Iron: 1.11 mg
Tried this recipe?
Mention @DadGotThis or tag #DadGotThis on Instagram!
Beyond Pancakes: Explore More from DadGotThis
We hope you’ve enjoyed mastering the art of Japanese soufflé pancakes. The journey of exploring new recipes and perfecting culinary techniques is endlessly rewarding. If you’re looking for more delicious breakfast ideas, cooking tips, or simply want to follow along with our latest kitchen adventures, be sure to connect with us!
Stay Connected on YouTube
Join our growing community and watch more step-by-step cooking guides and exciting food content by subscribing to our YouTube channel. Don’t miss out on upcoming recipes and culinary inspiration!
Not in the mood for pancakes? How about some irresistible French Toast?
If your craving leans more towards a rich, custardy breakfast delight, our French Toast recipe is an absolute must-try. Discover the secret trick that makes our French Toast truly stand out from the rest. It’s guaranteed to impress!
