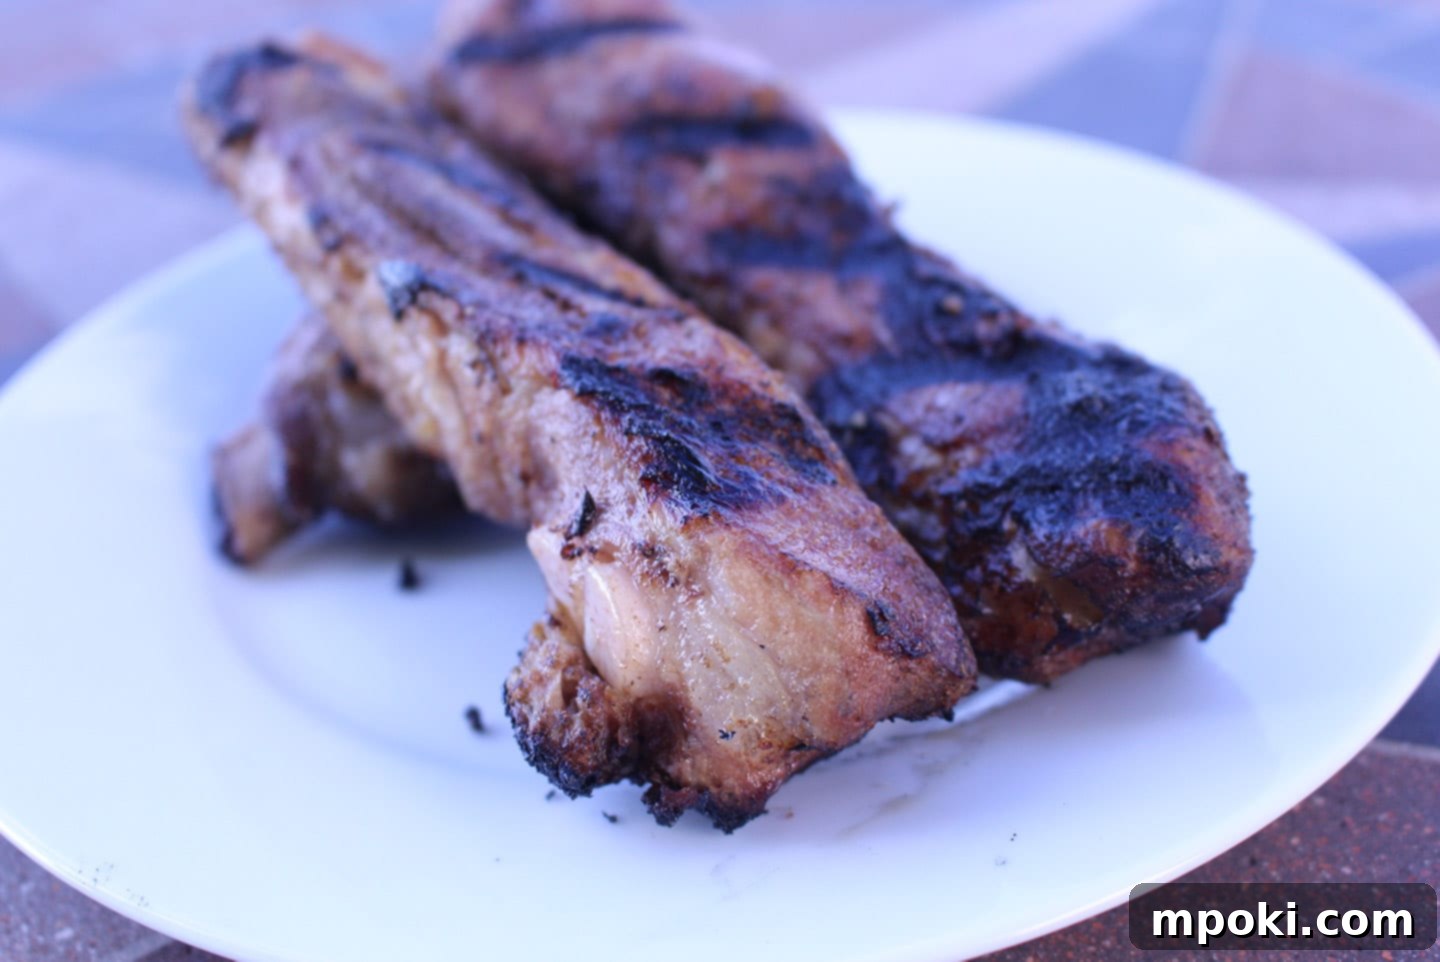
Mastering Sous Vide Spare Ribs: The Ultimate Guide to Fall-Off-The-Bone Perfection
Every home chef dreams of creating ribs so tender they effortlessly slide off the bone, yet remain packed with succulent flavor. For years, Dad had his trusted method for sous vide spare ribs: a consistent 165 degrees Fahrenheit for 12 hours. This always yielded fantastic results, with a pleasingly meaty bite. However, as often happens in life, a busy day led to an unexpected discovery.
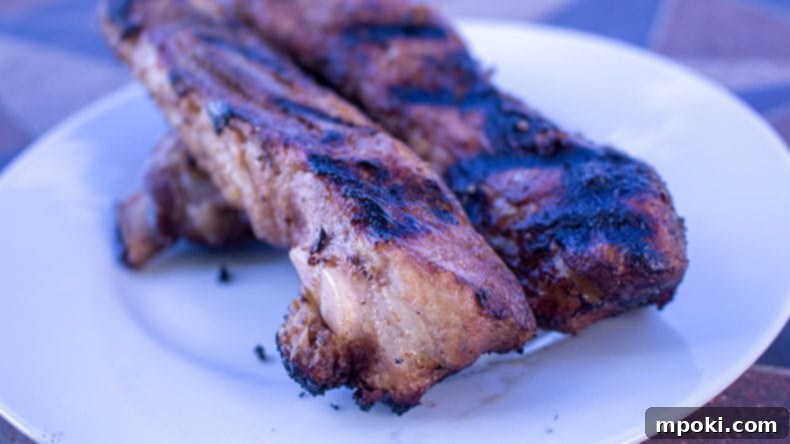
One fateful afternoon, Dad found himself overwhelmed with tasks, unable to attend to his ribs as planned. The sous vide circulator hummed on, extending the cooking time to a full 24 hours. Anticipating overcooked, mushy pork, he was instead met with an astonishing revelation. The 24-hour sous vide ribs were not just good; they were spectacularly tender, undeniably fall-off-the-bone, and incredibly juicy. What’s more, they held their shape beautifully after a quick, high-heat sear on the gas grill. This happy accident unveiled a new level of rib perfection, proving that sometimes, the best culinary discoveries are born from a little extra patience (or forgetfulness!).
This guide will share Dad’s perfected method for achieving these mouthwatering sous vide spare ribs, whether you prefer a slightly meatier texture or the ultimate fall-off-the-bone tenderness. We’ll delve into the precise steps, essential tips, and the secrets to finishing them on the grill for that irresistible crust. Get ready to elevate your rib game and impress everyone at your next cookout!
PIN IT TO PINTEREST
Save this easy recipe to Pinterest.
This Page Contains Affiliate Links. For more Information See My Disclosures here.
Why Sous Vide Ribs? Unlocking Unmatched Tenderness and Flavor
Sous vide cooking, a method where food is vacuum-sealed and cooked in a precisely temperature-controlled water bath, has revolutionized how we approach traditionally challenging cuts like ribs. While conventional methods like smoking, baking, or grilling can yield delicious ribs, they often come with the risk of uneven cooking, dry spots, or a texture that isn’t quite right.
The beauty of sous vide for spare ribs lies in its ability to deliver consistent results every single time. By cooking the ribs at an exact temperature throughout, you eliminate guesswork and achieve a perfectly cooked interior from edge to edge. This gentle, low-and-slow process breaks down tough connective tissues without overcooking the meat, resulting in an incredibly tender product that retains all its natural juices and flavor. No more dry, tough ribs! The vacuum-sealed environment ensures that moisture is locked in, preventing any flavor loss and allowing the seasonings to deeply penetrate the meat for maximum deliciousness.
Furthermore, sous vide offers incredible flexibility. You can cook the ribs ahead of time, chill them, and then finish them on the grill or in the oven just before serving. This makes entertaining a breeze and ensures perfectly cooked ribs without the stress of timing everything perfectly. Whether you’re aiming for a meaty, slightly chewy bite or a fall-off-the-bone experience, sous vide gives you precise control over the final texture, allowing you to customize your ribs exactly how you like them.
The Great Rib Debate: 12-Hour vs. 24-Hour Sous Vide Ribs
One of the most exciting aspects of sous vide cooking is the ability to fine-tune the texture of your meat by adjusting the cooking time. For spare ribs, the difference between a 12-hour and a 24-hour cook is subtle yet significant, catering to different preferences for that perfect rib experience.
12-Hour Sous Vide Ribs: A Meatier Delight
Cooking your spare ribs for 12 hours at 165°F (74°C) will result in ribs that are incredibly tender, but still offer a satisfying “bite.” The meat will be juicy and cooked through, yet it will hold onto the bone, requiring a gentle pull to separate. This is often the preferred texture for those who appreciate the classic rib-eating experience, where the meat comes off cleanly but isn’t mushy. It’s perfect for barbecue enthusiasts who enjoy gnawing a bit on the bone and savoring each succulent piece.
24-Hour Sous Vide Ribs: Unrivaled Fall-Off-The-Bone Tenderness
The accidental discovery of the 24-hour cook at 165°F (74°C) unveiled the secret to truly fall-off-the-bone ribs. Doubling the cooking time allows the connective tissues to break down even further, rendering the meat so unbelievably tender that it practically melts in your mouth. The ribs emerge from the water bath with an almost confit-like texture, juicy and incredibly rich. Despite the extended cook, they surprisingly maintain their shape, making them ideal for a quick sear on the grill without disintegrating. If your ultimate rib goal is maximum tenderness with minimal effort, the 24-hour method is your secret weapon. Both methods yield phenomenal results, so choose the duration that best suits your desired rib texture!
Essential Equipment for Perfect Sous Vide Spare Ribs
To embark on your sous vide rib journey, you’ll need a few key pieces of equipment. Don’t worry, once you have them, they’ll open up a world of culinary possibilities beyond just ribs!
First and foremost, an Immersion Circulator is essential. This device heats and circulates water in your cooking vessel, maintaining a precise and consistent temperature, which is the cornerstone of sous vide cooking. Without it, you can’t achieve that perfect even cook.
Next, you’ll need a Cooking Vessel. This can be any large pot, a dedicated sous vide container, or even a cooler. The main requirements are that it’s deep enough to fully submerge your ribs and can hold enough water for your circulator to work effectively.
A Vacuum Sealer and corresponding vacuum bags are crucial for sealing your ribs. This removes air, ensuring efficient heat transfer from the water to the food and preventing any moisture loss. If you don’t have a vacuum sealer, the water displacement method with high-quality freezer bags can be a viable alternative.
Because pork ribs tend to float, you’ll need a Weight of some kind to keep them fully submerged in the water bath. This could be ceramic pie weights, heavy-duty clips, or even a plate. Ensuring the ribs are completely underwater is vital for safe and proper cooking.
Finally, for the crucial finishing step, a Gas Grill (or charcoal grill) is highly recommended. While you can sear in a cast-iron pan, grilling adds an irreplaceable smoky flavor and beautiful char that truly elevates sous vide ribs.
Preparing Your Spare Ribs: From Silver Skin to Seasoning
Proper preparation is key to the success of your sous vide spare ribs. It ensures both tenderness and maximum flavor absorption.
Remove the Silver Skin
The first crucial step is to remove the silver skin (also known as the membrane) from the back of the ribs. This thin, tough membrane doesn’t break down during cooking and can result in chewy ribs. To remove it, simply slide a knife under one corner of the membrane, gently lift, and then grip it with a paper towel (for better traction) and pull it off. If you’re unsure how, don’t worry, Dad has a video guide to help you master this in no time!
Break Down the Slab
Once the silver skin is removed, you can break down the full slab of spare ribs into individual or smaller sections, typically 2-3 bone portions. This allows for easier handling, more even seasoning, and better fit into your vacuum bags and cooking vessel.
Season Generously
Now it’s time to impart flavor! For our sous vide spare ribs, a simple yet effective dry rub works wonders. Generously season both sides of your rib sections with a blend of garlic powder, onion powder, salt, and black pepper. Don’t be shy; the sous vide process locks in these flavors beautifully. Feel free to experiment with your favorite rub, but this classic combination ensures a delicious base that pairs well with any finishing sauce.
Vacuum Seal for Perfection
Place your seasoned rib sections into vacuum sealer bags. Ensure the ribs are in a single layer as much as possible to promote even cooking. Use your vacuum sealer to remove all air and create a tight seal. This is vital for efficient heat transfer and to prevent any floating issues. Once sealed, you can either freeze the ribs for future enjoyment or proceed directly to the sous vide bath.
The Sous Vide Cook: Precision & Patience
With your ribs prepped and sealed, it’s time for the magic of the water bath to work its wonders. This is where precision and patience pay off, transforming ordinary ribs into an extraordinary culinary experience.
Setting Up the Water Bath
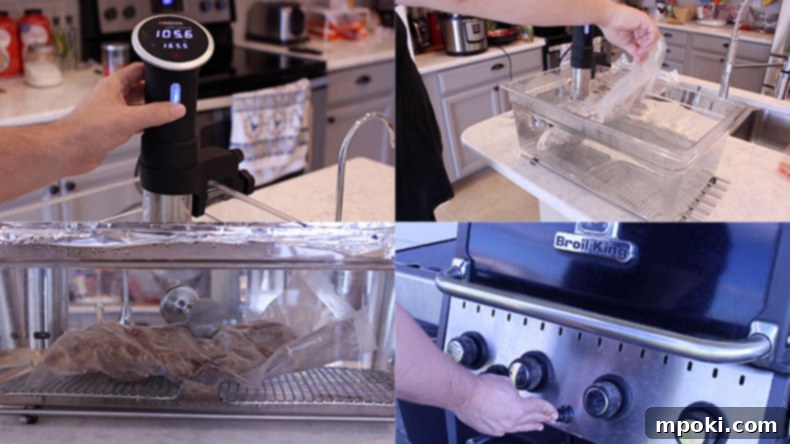
Begin by filling your cooking vessel with water. The size of your vessel will depend on the amount of ribs you’re cooking, but ensure it’s large enough for the ribs to be fully submerged without overcrowding. If you have wire racks, place them at the bottom of the vessel; this allows water to circulate underneath the ribs, ensuring even cooking. Install your immersion circulator and set the temperature to 165 degrees Fahrenheit (74 degrees Celsius). Allow the water to come up to temperature before adding the ribs.
Submerging the Ribs Safely
Once the water reaches the set temperature, carefully place your vacuum-sealed rib bags into the water bath. It’s critical that the ribs are completely submerged. Pork ribs have a tendency to float, which can lead to improper and potentially unsafe cooking if portions are exposed to air. To prevent this, use some form of weight to hold the bags down. This could be a plate, heavy-duty clips, or specialized sous vide weights. If any part of the ribs is not submerged during the cook, it is generally advised to discard them for safety reasons.
The Long Wait
Cover your cooking vessel with a lid or aluminum foil. This helps to reduce water evaporation, especially important during longer cooks, and maintains temperature stability. Now, let the ribs cook for your chosen duration:
- For a meatier, more “bite off the bone” style rib, cook for 12 hours.
- For absolutely fall-off-the-bone tender ribs, cook for a full 24 hours.
During this time, the immersion circulator will maintain the perfect temperature, slowly breaking down the tough connective tissues in the ribs and infusing them with flavor. This hands-off cooking allows you to go about your day while your ribs transform into tender perfection.
Finishing Strong: Achieve That Perfect Grilled Crust
The sous vide process delivers incredible tenderness and juiciness, but the final searing step is what gives your ribs that irresistible crust, char, and smoky flavor that makes them truly exceptional. This stage requires quick action and high heat.
Prepare Your Grill
About 15-20 minutes before your sous vide cooking time is complete, preheat your grill (gas or charcoal) to high heat. You want it blazing hot to achieve a rapid, effective sear without further cooking the interior of the ribs.
Remove and Drain
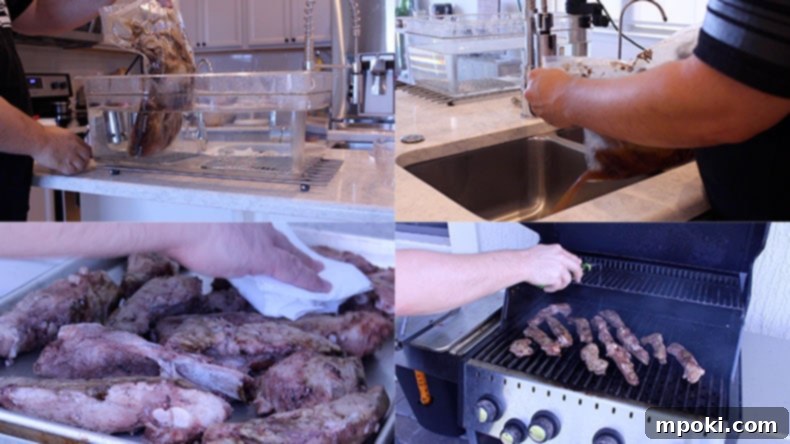
Once the sous vide cook time has elapsed, carefully remove the sealed bags of ribs from the water bath. Cut open the bags and drain out any accumulated liquid (often called “purge”). This liquid is a flavorful byproduct of the sous vide process; don’t discard it! You can save it to make a delicious gravy, enrich sauces, or add depth to soups. Simply strain it and store it in the refrigerator for future use.
The Critical Drying Step
After draining, remove the ribs from the bags and place them on a clean surface or a wire rack. This next step is absolutely crucial for achieving a beautiful sear: pat the ribs thoroughly dry with paper towels. Any moisture on the surface will cause the ribs to steam rather than sear, hindering the formation of that desirable browned crust. Take your time to get them as dry as possible.
Ready for the Grill
With your grill screaming hot and your ribs perfectly dry, you’re now ready for the final, exhilarating step. This quick sear will add the smoky, caramelized exterior that perfectly complements the tender, juicy interior created by the sous vide.
Grilling to Perfection: The Searing Stage
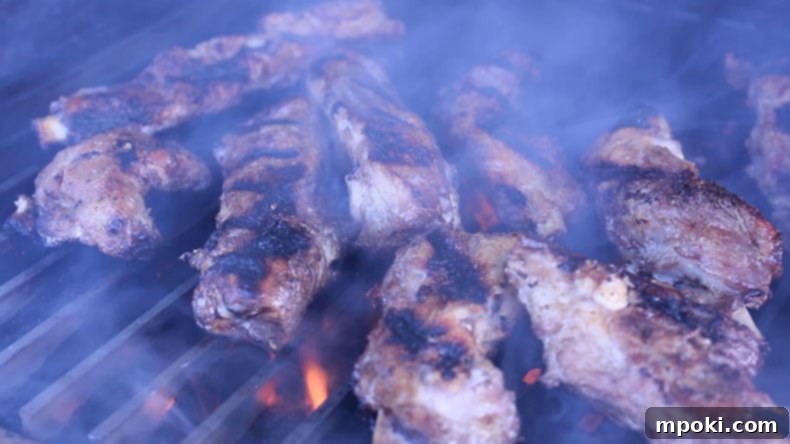
The searing stage is where the magic happens, transforming the pale, cooked ribs into golden-brown, flavorful masterpieces with a perfect crust. This step is quick and requires your full attention.
High Heat, Quick Sear
Carefully place the dried sous vide ribs directly onto the preheated, hot grill grates. You want to achieve a good char and color in just a few minutes per side. The goal is to develop that delicious Maillard reaction on the surface without significantly increasing the internal temperature of the ribs, which are already perfectly cooked.
Dad’s Trick for an Even Faster Char
If you’re using a gas grill and want to accelerate the browning and char, try Dad’s clever trick: lightly drizzle a small amount of vegetable oil over the ribs as they sear. Be cautious, as this will likely cause a flare-up. However, this controlled burst of flame helps to quickly char the surface of the ribs, developing a rich color and smoky flavor much faster. Keep a close eye on them and be ready to move them if the flames get too intense.
Sauce or No Sauce?
Once your ribs have achieved a beautiful color and a satisfying crust, you have a couple of options. You can brush them generously with your favorite barbecue sauce during the last few minutes of grilling, allowing the sauce to caramelize and become sticky. Alternatively, for those who appreciate the pure flavor of the seasoned pork, you can remove them from the grill and serve them as is, perhaps with a side of “sawsawan.” Dad’s family loves a simple yet flavorful “sawsawan” – a Filipino dipping sauce typically made from a mixture of soy sauce, spiced white vinegar, minced garlic, and sliced onion. This bright, tangy, and savory condiment offers a wonderful contrast to the rich, tender ribs.
No matter how you choose to finish them, these sous vide spare ribs are guaranteed to be a hit!
Sous Vide Spare Ribs
Print
Pin
Rate
Equipment
- Immersion Circulator
- Cooking Vessel
- Weight
- Wire Cooling Racks
- Vacuum Sealer
- Gas Grill
Ingredients
- 5 lbs Pork Spare Ribs
- 1 tablespoon Garlic Powder
- 1 tablespoon Onion Powder
- 1 tablespoon Salt
- 1 teaspoon Black Pepper
- ½ cup Vegetable Oil (For drizzling over the ribs on grill)
Instructions
- Remove the silver skin from the ribs and break them down into single bones or smaller sections.
- Season generously with the garlic powder, onion powder, salt and pepper.
- Vacuum seal the seasoned ribs in bags and either freeze for later or cook right away.
- Fill your cooking vessel with water and place wire racks at the bottom (to allow water to flow under the ribs as they cook).
- Install your immersion circulator and set it to 165 degrees Fahrenheit.
- Once the water is up to temperature, place the vacuum sealed ribs inside the vessel. Then, place some kind of weight over them because pork will float. If the ribs float and a portion of them is not submerged during the cook, it is not safe to eat the ribs.
- Cover your vessel with a lid or use aluminum foil to help reduce evaporation and water loss.
- Let the ribs cook for 12 hours if you want a meatier, more bite-off-the-bone style ribs, or cook a full 24 hours if you want absolutely fall-off-the-bone tender ribs.
- When the cook time is up, remove the ribs from the water bath.
- Drain the liquid from the bag and remove the ribs. Remember you can save this liquid for gravies or sauces!
- Pat the ribs thoroughly dry with paper towels so they don’t steam when you put them on the grill. This will ensure you get a nice, crispy sear.
- Place the ribs on your preheated grill and pour a little bit of vegetable oil over them (be careful of flare-ups, this helps char them faster). This will help you get the char and color on them faster.
- At this point, you can add your favorite barbecue sauce and grill for a few more minutes until caramelized, or remove them and serve with a dipping sauce like “sawsawan” (a mixture of soy sauce, spiced white vinegar, garlic, and onion), as Dad’s family enjoys.
Video
Nutrition
 Tried this recipe?Mention @DadGotThis or tag #DadGotThis!
Serving Suggestions & Pairings for Your Perfect Ribs
Now that you’ve mastered the art of sous vide spare ribs, it’s time to think about how to best enjoy them! These tender, flavorful ribs are incredibly versatile and pair well with a wide array of classic barbecue and comfort food sides. Here are a few suggestions to complete your meal:
- Classic BBQ Sides: Coleslaw, potato salad, corn on the cob (grilled or boiled), baked beans, and macaroni and cheese are timeless companions for ribs. Their creamy, tangy, or sweet profiles perfectly complement the rich pork.
- Fresh and Bright Salads: A crisp green salad with a vinaigrette dressing, or a vibrant cucumber and tomato salad, can offer a refreshing contrast to the richness of the ribs.
- Bread: Serve with cornbread, dinner rolls, or even some crusty garlic bread to soak up any delicious juices.
- Beverages: For drinks, consider a cold beer, a crisp hard cider, or a bold red wine like a Zinfandel or Syrah. Non-alcoholic options like iced tea or homemade lemonade are also excellent choices.
Don’t forget to offer a selection of your favorite barbecue sauces on the side, allowing everyone to customize their ribs to their liking. And if you tried Dad’s “sawsawan” suggestion, be sure to have plenty for dipping!
Troubleshooting Common Sous Vide Rib Issues
While sous vide cooking is generally forgiving, a few common issues can arise. Here’s how to address them:
Ribs Floating in the Water Bath
This is the most common problem. If your vacuum-sealed bags of ribs float, it means part of the meat is exposed to air and not cooking at the precise water temperature. This is a food safety concern. Always ensure your ribs are fully submerged by using a heavy ceramic plate, metal clips, or specialized sous vide weights. If you notice floating during a long cook, and you’re unsure how long they’ve been exposed, it’s safer to discard them.
No Good Sear or Crust After Grilling
The primary culprit here is usually moisture. If your ribs aren’t thoroughly patted dry with paper towels after the sous vide bath, they will steam on the grill instead of searing. Ensure your grill is preheated to very high heat, and don’t overcrowd the grates, which can lower the temperature. A drizzle of vegetable oil on a hot gas grill (as mentioned in Dad’s tip) can also help accelerate browning.
Ribs are Mushy
While tender, fall-off-the-bone ribs are the goal, “mushy” is generally not. If your ribs lack any semblance of texture, it might be due to an overly long cook time or a slightly too high temperature. For a meatier texture, stick to the 12-hour cook. Ensure your immersion circulator is accurately calibrated to avoid overcooking. Remember, the goal is tender, not disintegrated.
Bags Leak During Cooking
A leaky bag can compromise food safety and dilute your rib’s flavor. Always double-check your vacuum seal before placing bags in the water. If using the water displacement method with freezer bags, ensure the bag is securely clipped to the side of the vessel, with the opening above the waterline.
By keeping these tips in mind, you can ensure a smooth cooking process and consistently perfect sous vide spare ribs every time!
Beyond Ribs: Explore More Sous Vide Adventures with Dad
Don’t know how to break down a slab of spare ribs?
Don’t worry about it if butchering a full slab of ribs seems daunting. Dad Got This! Preparing your ribs properly, especially removing the silver skin and breaking them down, sets the stage for success. Watch Dad’s “Dad Hack” video on how to break down spare ribs. He’ll have you confidently butchering like a pro in a flash, making your sous vide rib preparation even easier.
Why not give Sous Vide Picanha a try next?
If you’re loving the precision and delicious results of sous vide, your culinary journey shouldn’t stop at ribs! Another incredible cut that truly shines with this method is Picanha. Also known as sirloin cap, Picanha is a flavorful, tender cut of beef with a distinct fat cap that renders beautifully when cooked sous vide. Dad’s recipe for Sous Vide Picanha is so simple and delivers such a mouth-watering, medium-rare steak that it would truly be a shame if you didn’t give it a try. Expand your sous vide repertoire and discover your next favorite meal!
